

1
Add a new app
- In the Blnk Cloud dashboard, open
Appsfrom the side navigation (bottom left). - Click
New appon the right side of the Apps page.
This opens the manifest form, where you’ll enter the app details in the next step.
2
Upload your app manifest
The manifest tells Blnk Cloud how to display, install, and launch your app. Fill in the manifest form with the details below.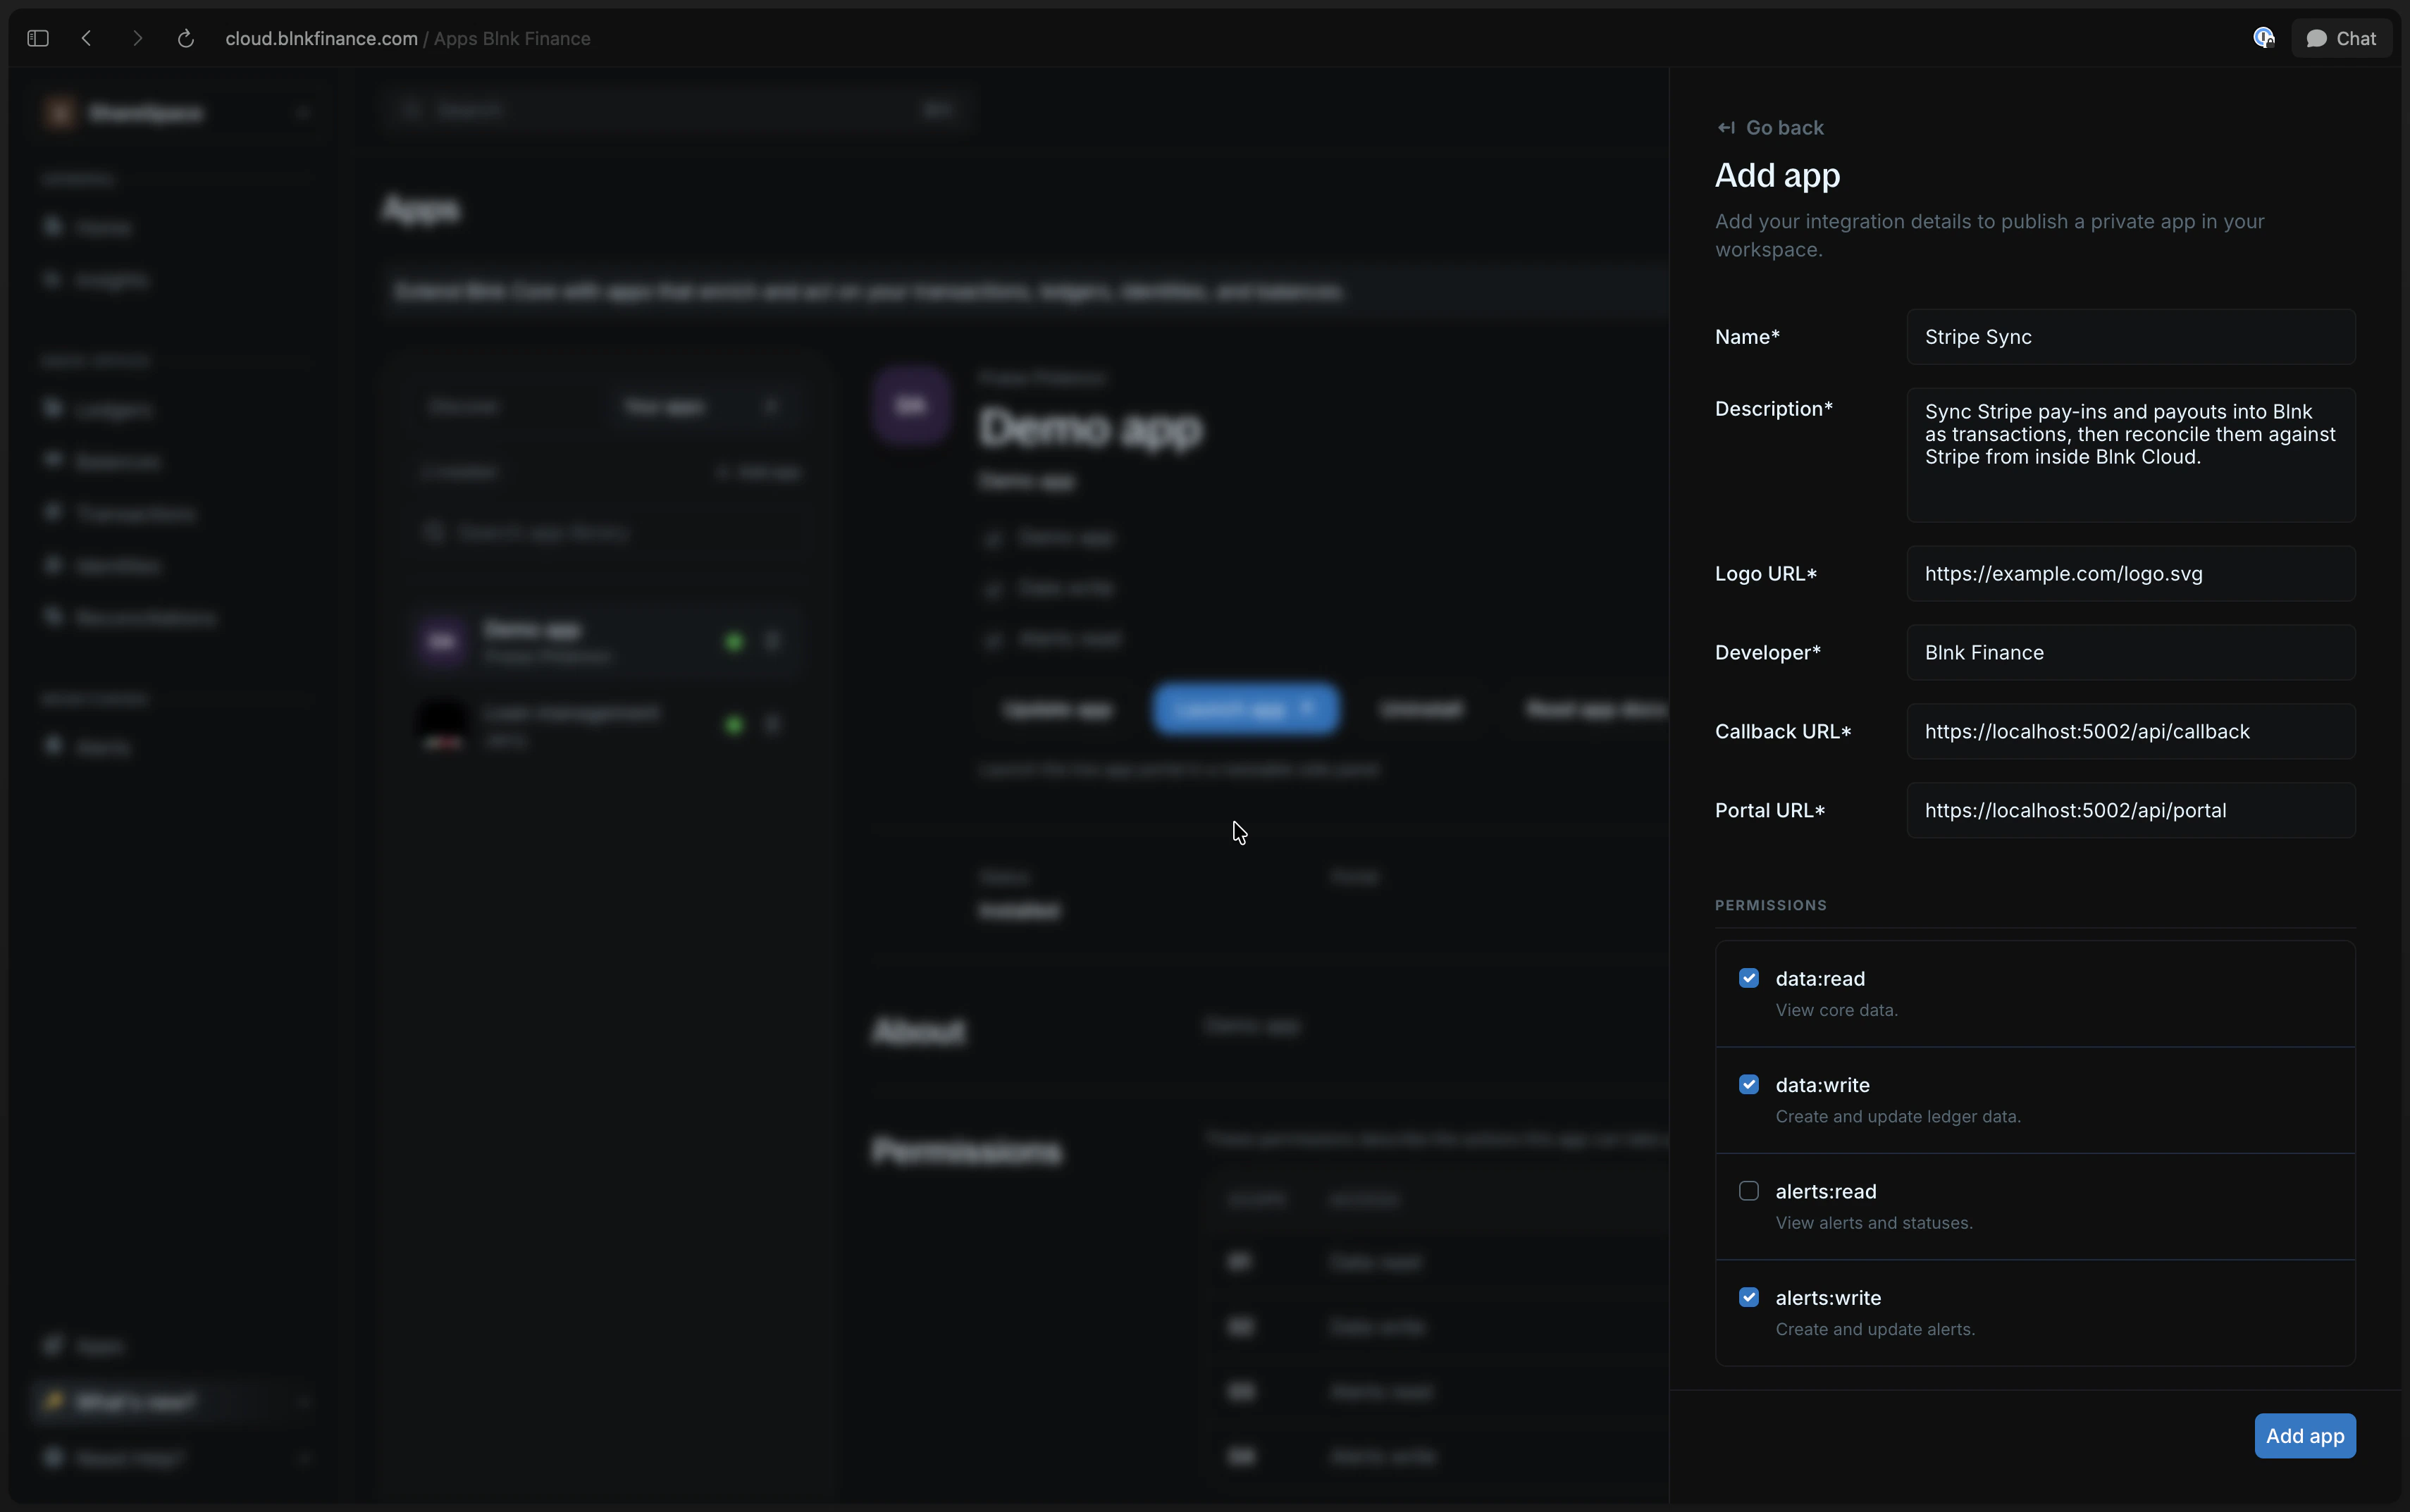
When you register the app, you can limit launch access to specific team members. Leave this unset to allow everyone in the workspace to launch the app.For our Stripe Sync app, using our routes from the codebase setup step, our manifest looks like this:
Make sure that your base URL is accessible from the internet. If localhost, you can use a service like ngrok to create a public URL in place of
localhost:5002.3
Submit to your workspace
Submit the manifest, and you’re done! The app will be added to your organization’s Apps library.Only team members in your workspace can see and install it on whichever Cloud instances they use there.
Supported permissions
Permissions define what your app can access or change in the selected Cloud instance. Your app can request any combination of these scopes:Remember: Users choose which permissions to grant during installation. Always read granted_permissions from the install payload and only use what was granted.
If a permission is missing, the app should show a clear error or hide the action from the portal.
Run the example Stripe Sync app
Reference Stripe sync implementation.