

- Enhanced security: No need to expose database credentials or configure complex firewall rules.
- Read-only access: Agent only requires SELECT permissions, ensuring data integrity.
- Simplified setup: No need to configure network settings or firewall rules.
- Reliable connection: Automatic reconnection and health monitoring.
Connect your self-hosted Core
Create an instance on Cloud
- In your Blnk Cloud workspace, go to Settings → Instances;
- Click Deploy an instance;
- You’ll see the instance creation form.
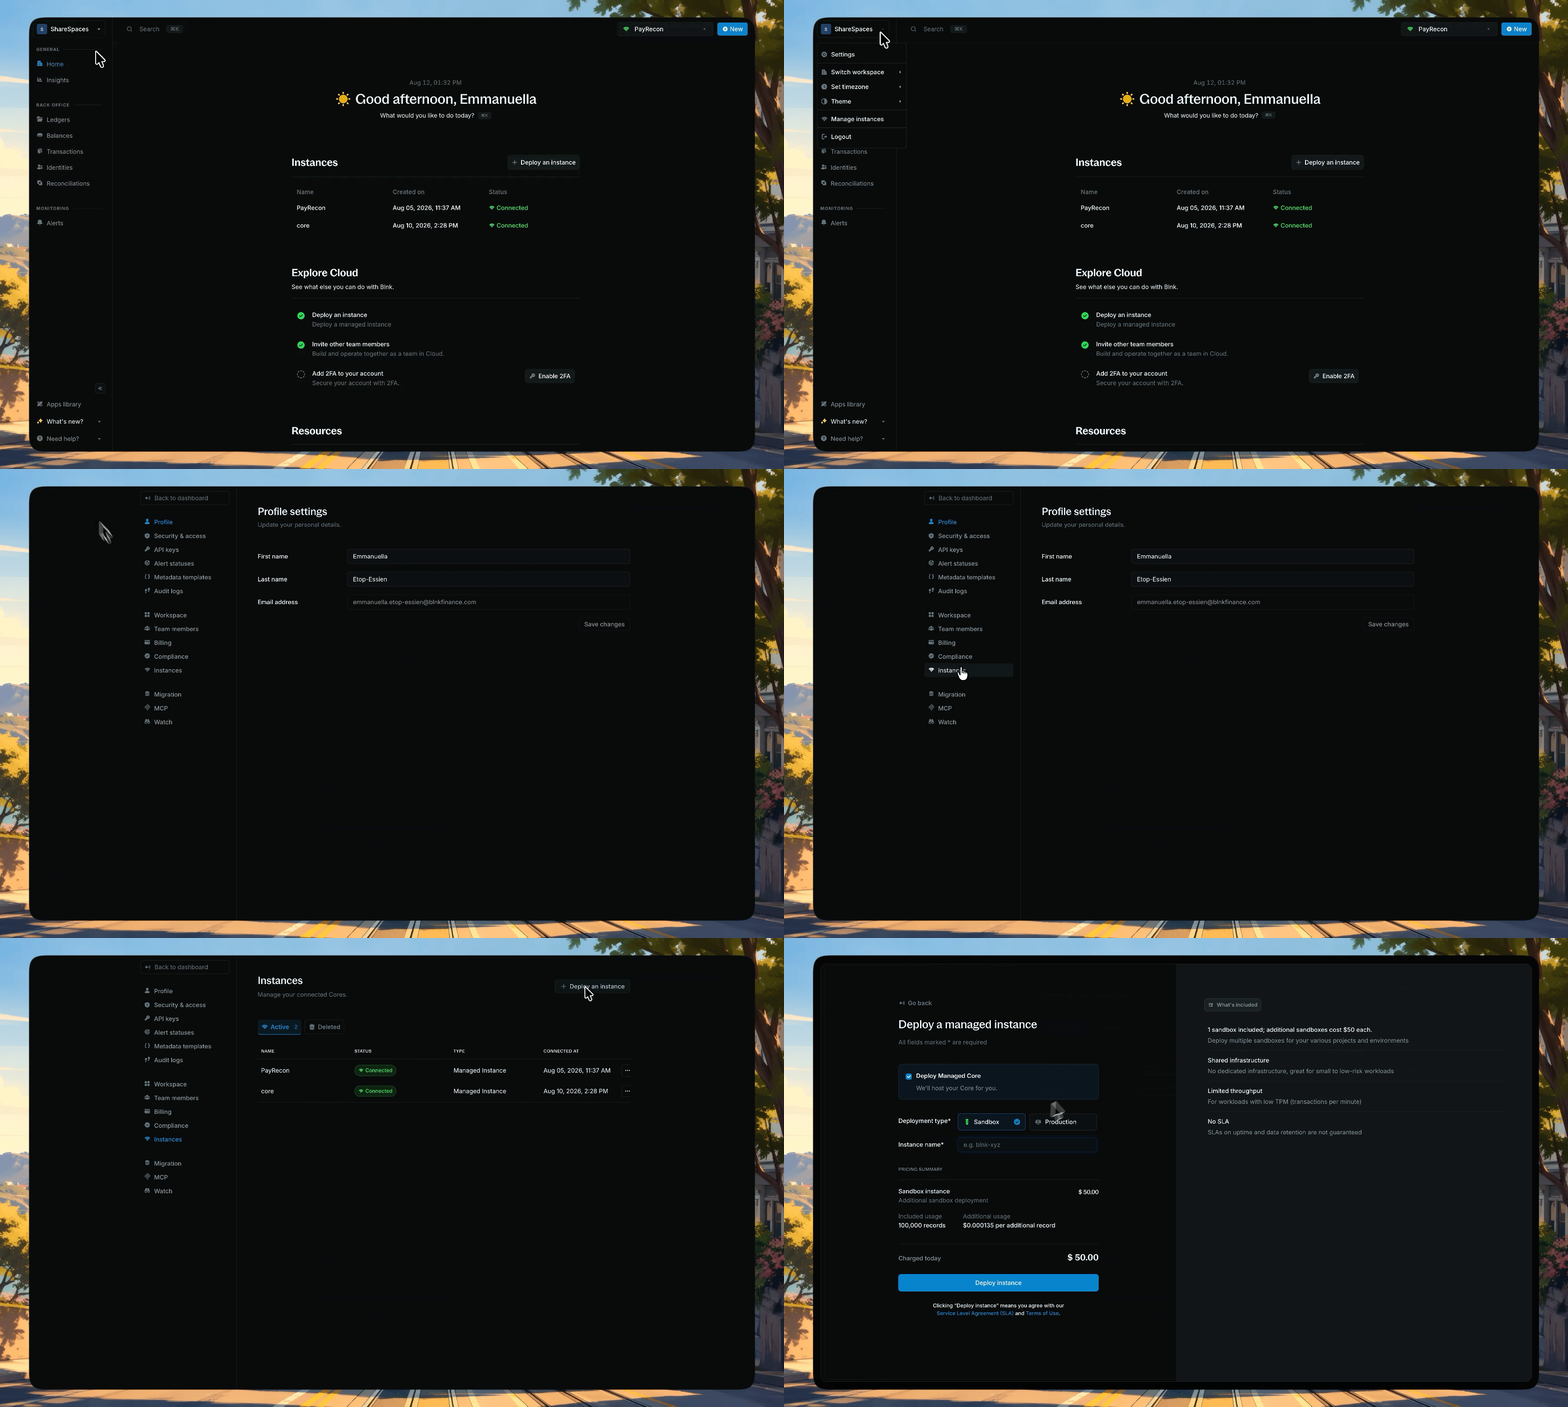
Go to Settings → Instances and click Deploy an instance
Provide instance details
- Instance name: Choose a descriptive name (e.g., “Production”, “Staging”). This is the only required field;
- Core URL: Your Blnk Core instance URL (e.g., https://api.yourcompany.com):
- Make sure it is publicly accessible on the internet. If locally hosted, use a tunnel service like ngrok:
ngrok http 5001to create a public URL. - If hosted on a private network, make sure to whitelist our IP addresses so that Cloud can communicate with your ledger:
161.35.166.95161.35.171.250
- Make sure it is publicly accessible on the internet. If locally hosted, use a tunnel service like ngrok:
- Core secret key: Your Blnk Core API secret key set in your
blnk.jsonconfiguration file. You can leave this empty if you don’t have a secret key.
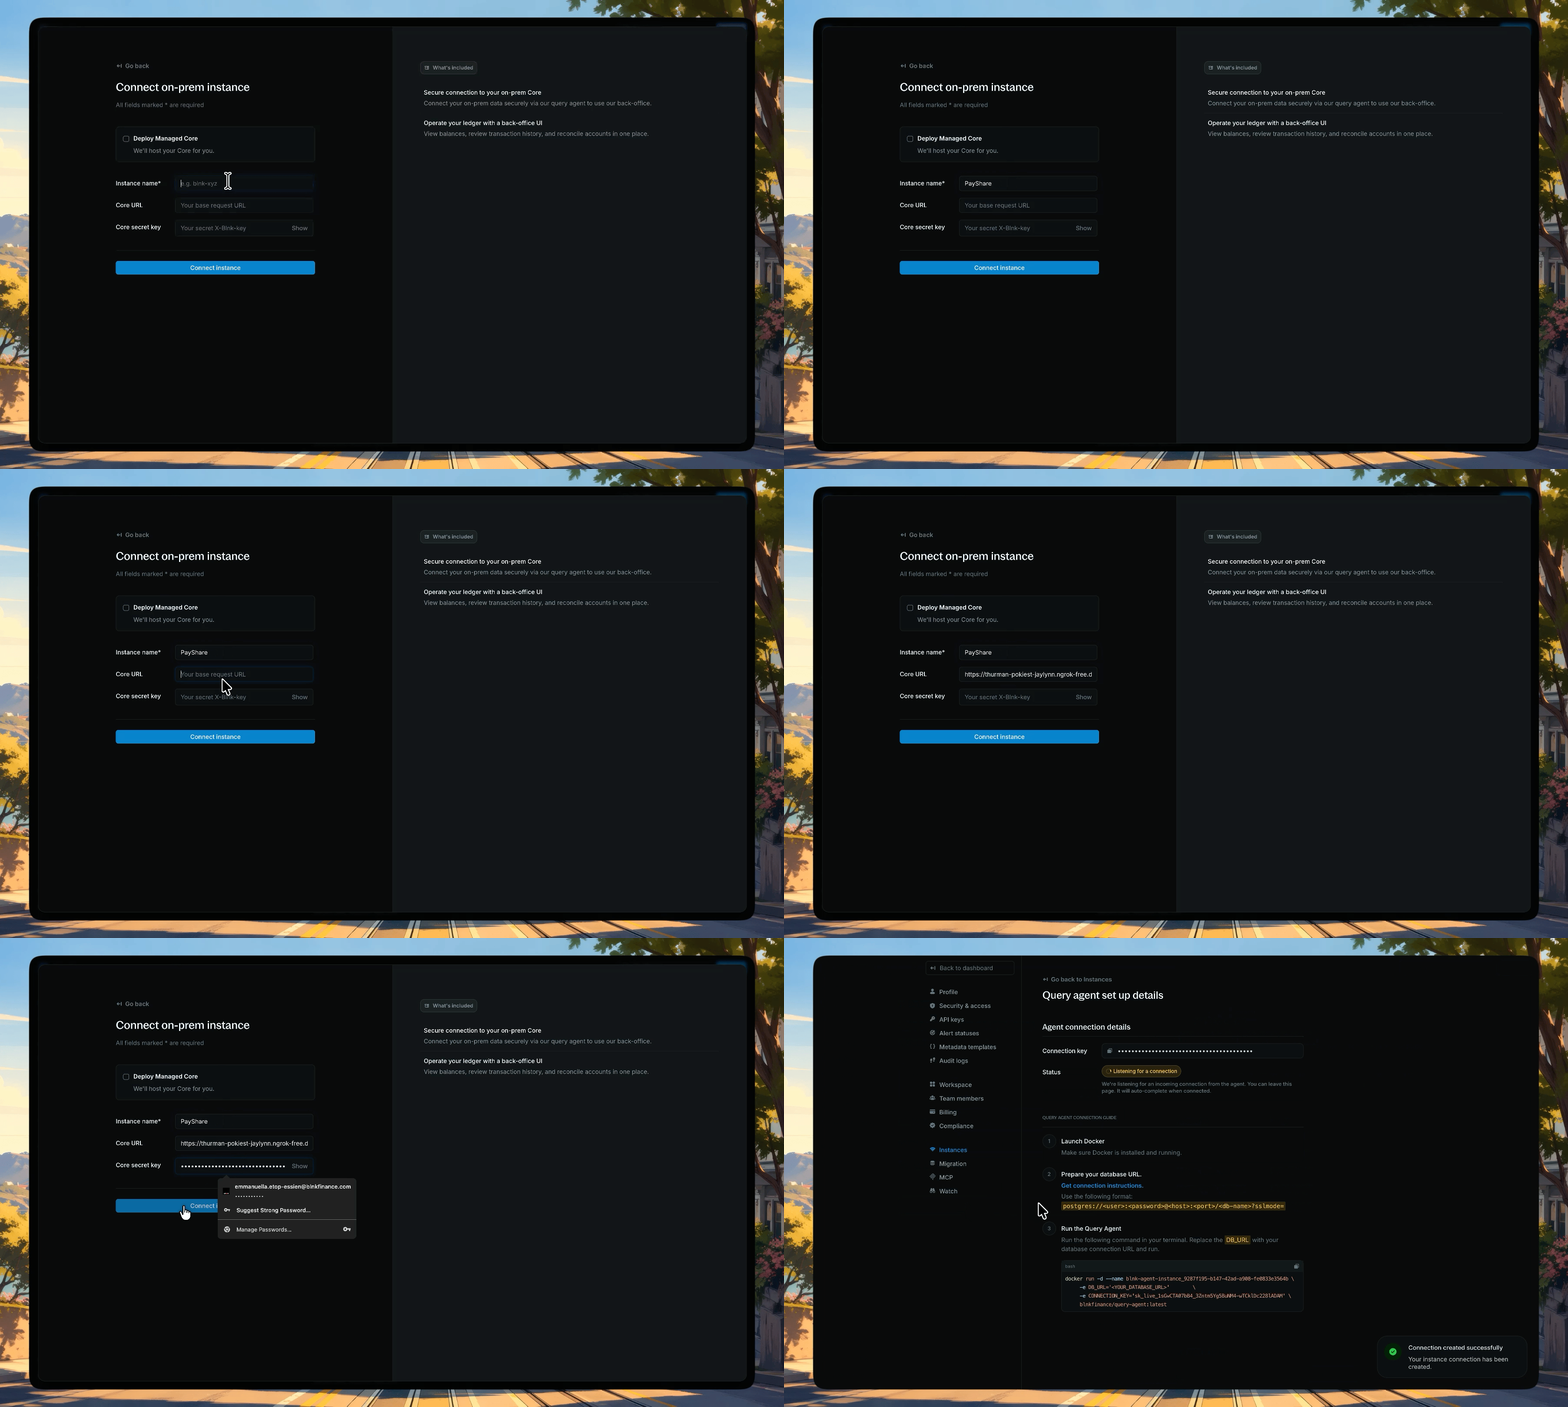
Fill in your instance name, Core URL, and Core secret key, then create the connection
Set up the Query Agent
- Go to Settings → Instances.
- Open the instance actions list or the instance details panel, then click View setup details.
- Copy the Docker command from the Query Agent setup page. It already includes your connection key.
- Replace
<YOUR_DATABASE_URL>with your PostgreSQL connection string fromblnk.json.
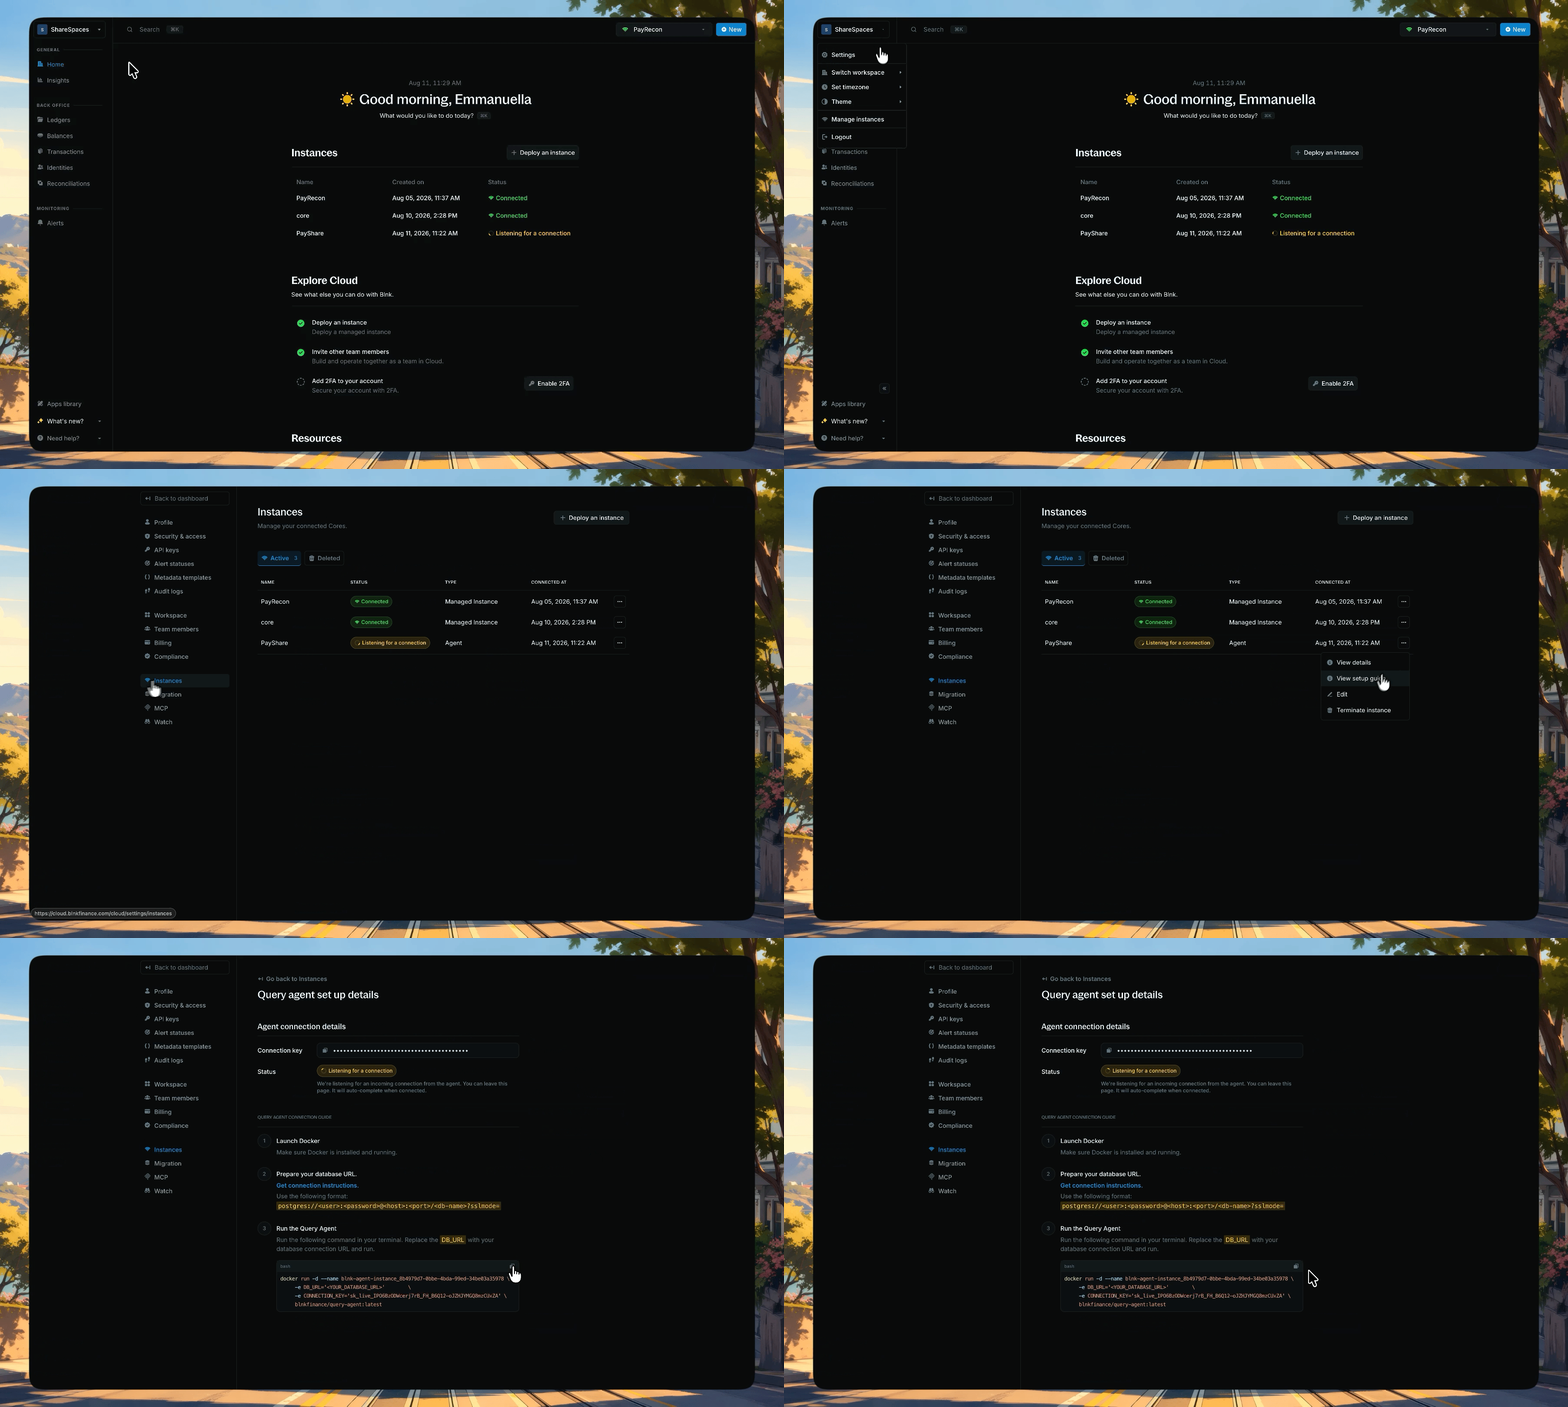
Open View setup details and copy the Docker command from the Query Agent setup page
blnk.json, see how to connect to your instance in Docker.Verify connection
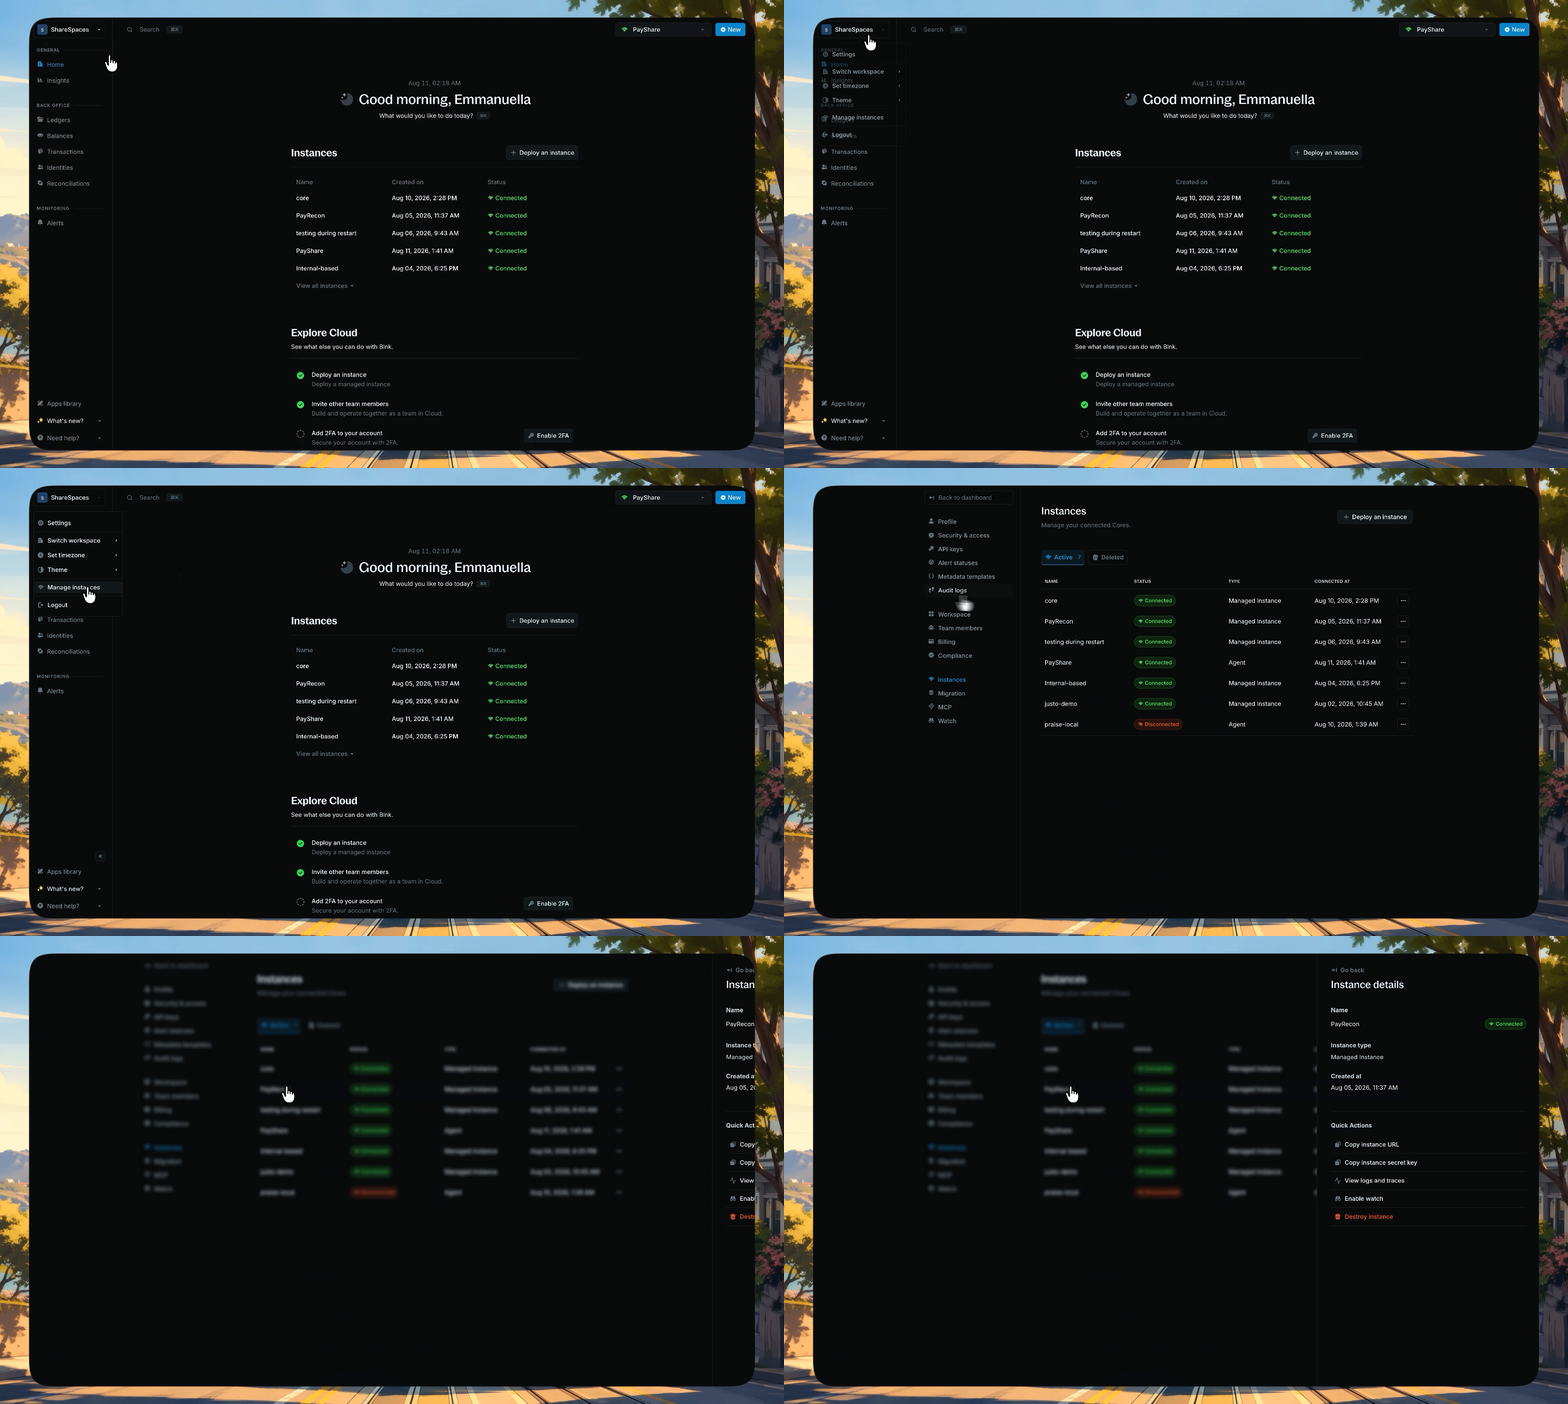
Click an instance from the homepage or Settings → Instances to open its details panel
Connecting to your database running inside your Docker container
To connect to your database running inside your Docker container:Check the network of the postgres container
Run the Query Agent on the same network
<network-name>with the network name from the previous step, e.g.--network blnk_default.- Update the
DB_URLwith your actual database connection details. You can find it in your defaultblnk.jsonconfiguration file. - Important: Since you’re running the Query Agent in the same network as your Core docker image, keep
postgresas the host in your connection string. This is the service name of your PostgreSQL container. - Replace
sk_live_...with your actual connection key from the connection setup page on Cloud.
Edit your instance
Go to Settings → Instances, open the instance actions list, and click Edit instance. You can change the name, Core URL, or Core secret key.Core URL
ngrok http 5001 to create a public URL.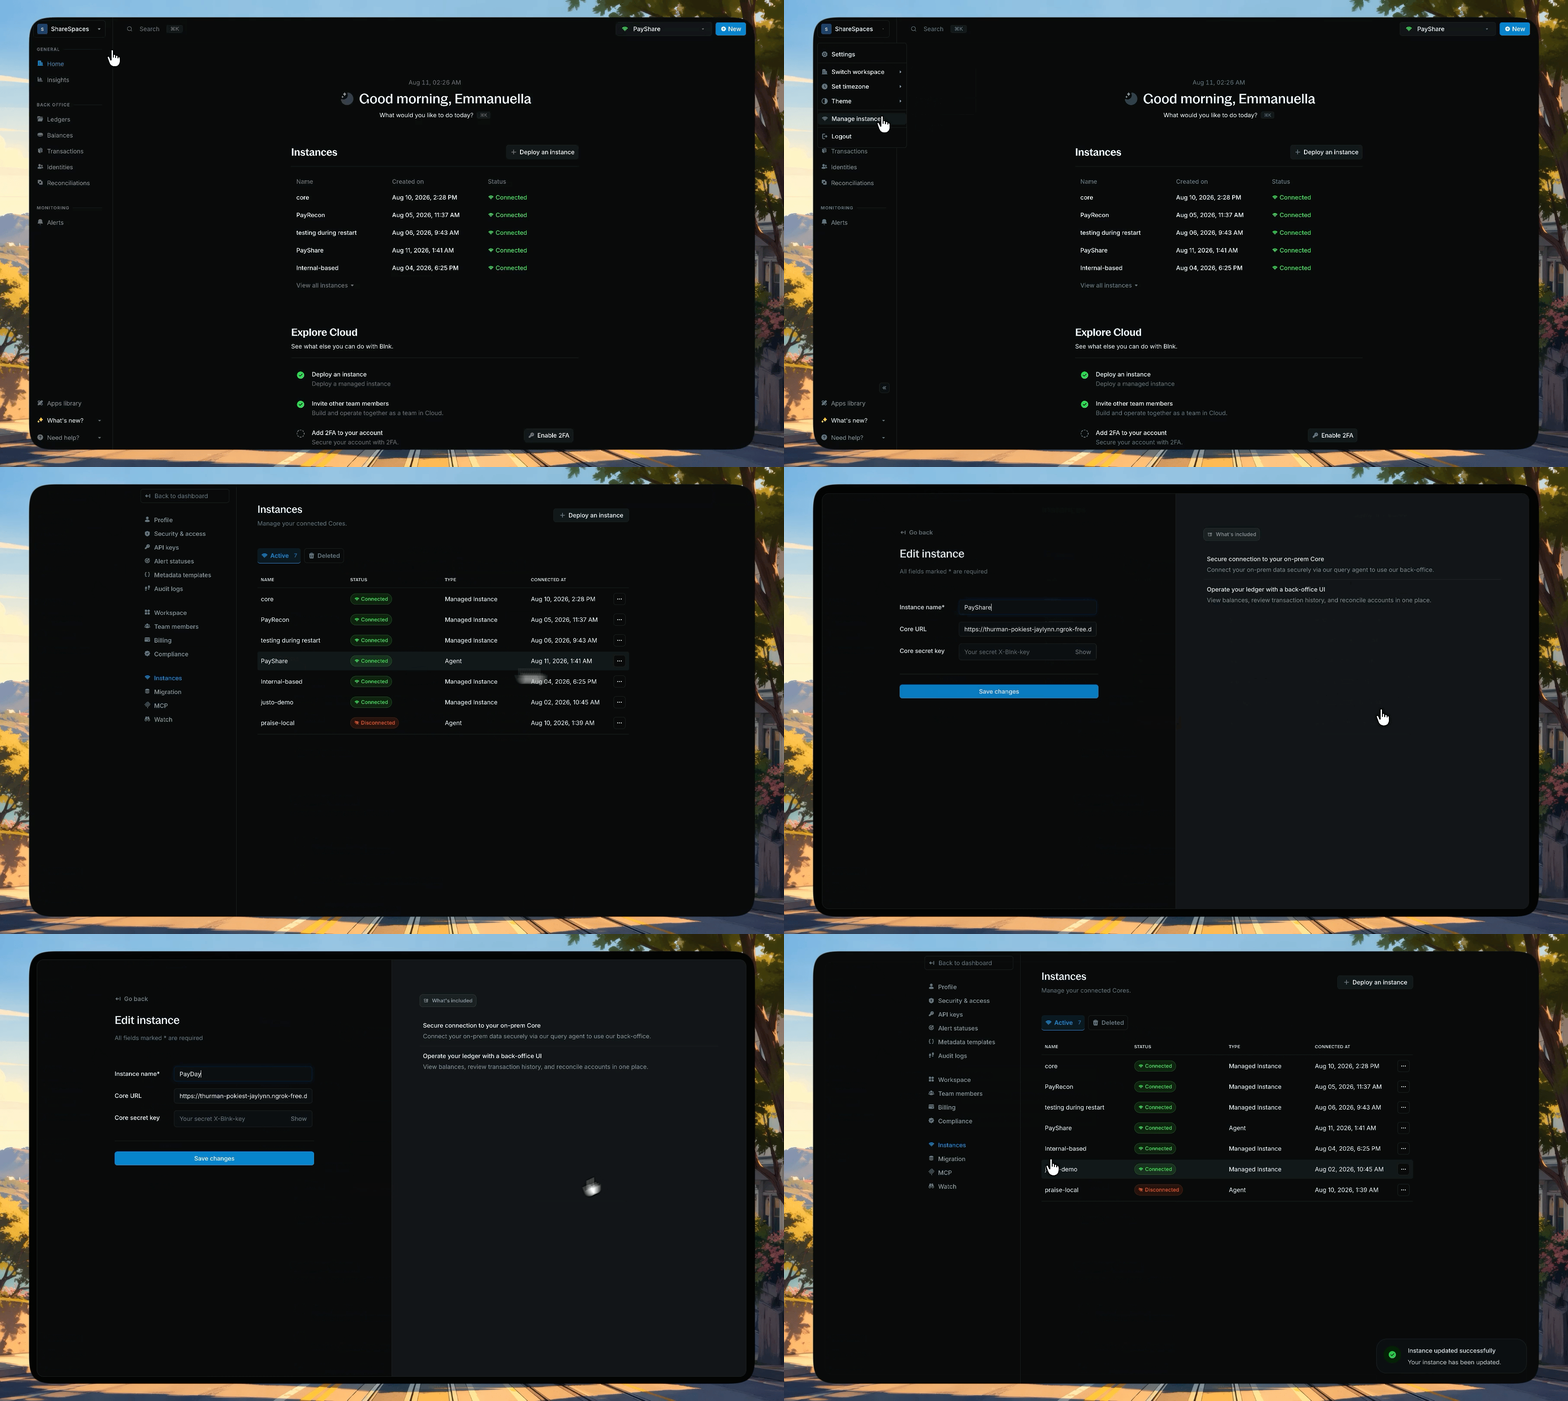
Open the actions list, click Edit instance, and update the Core URL or secret key
Core secret key
Managing your query agent
View the setup guide
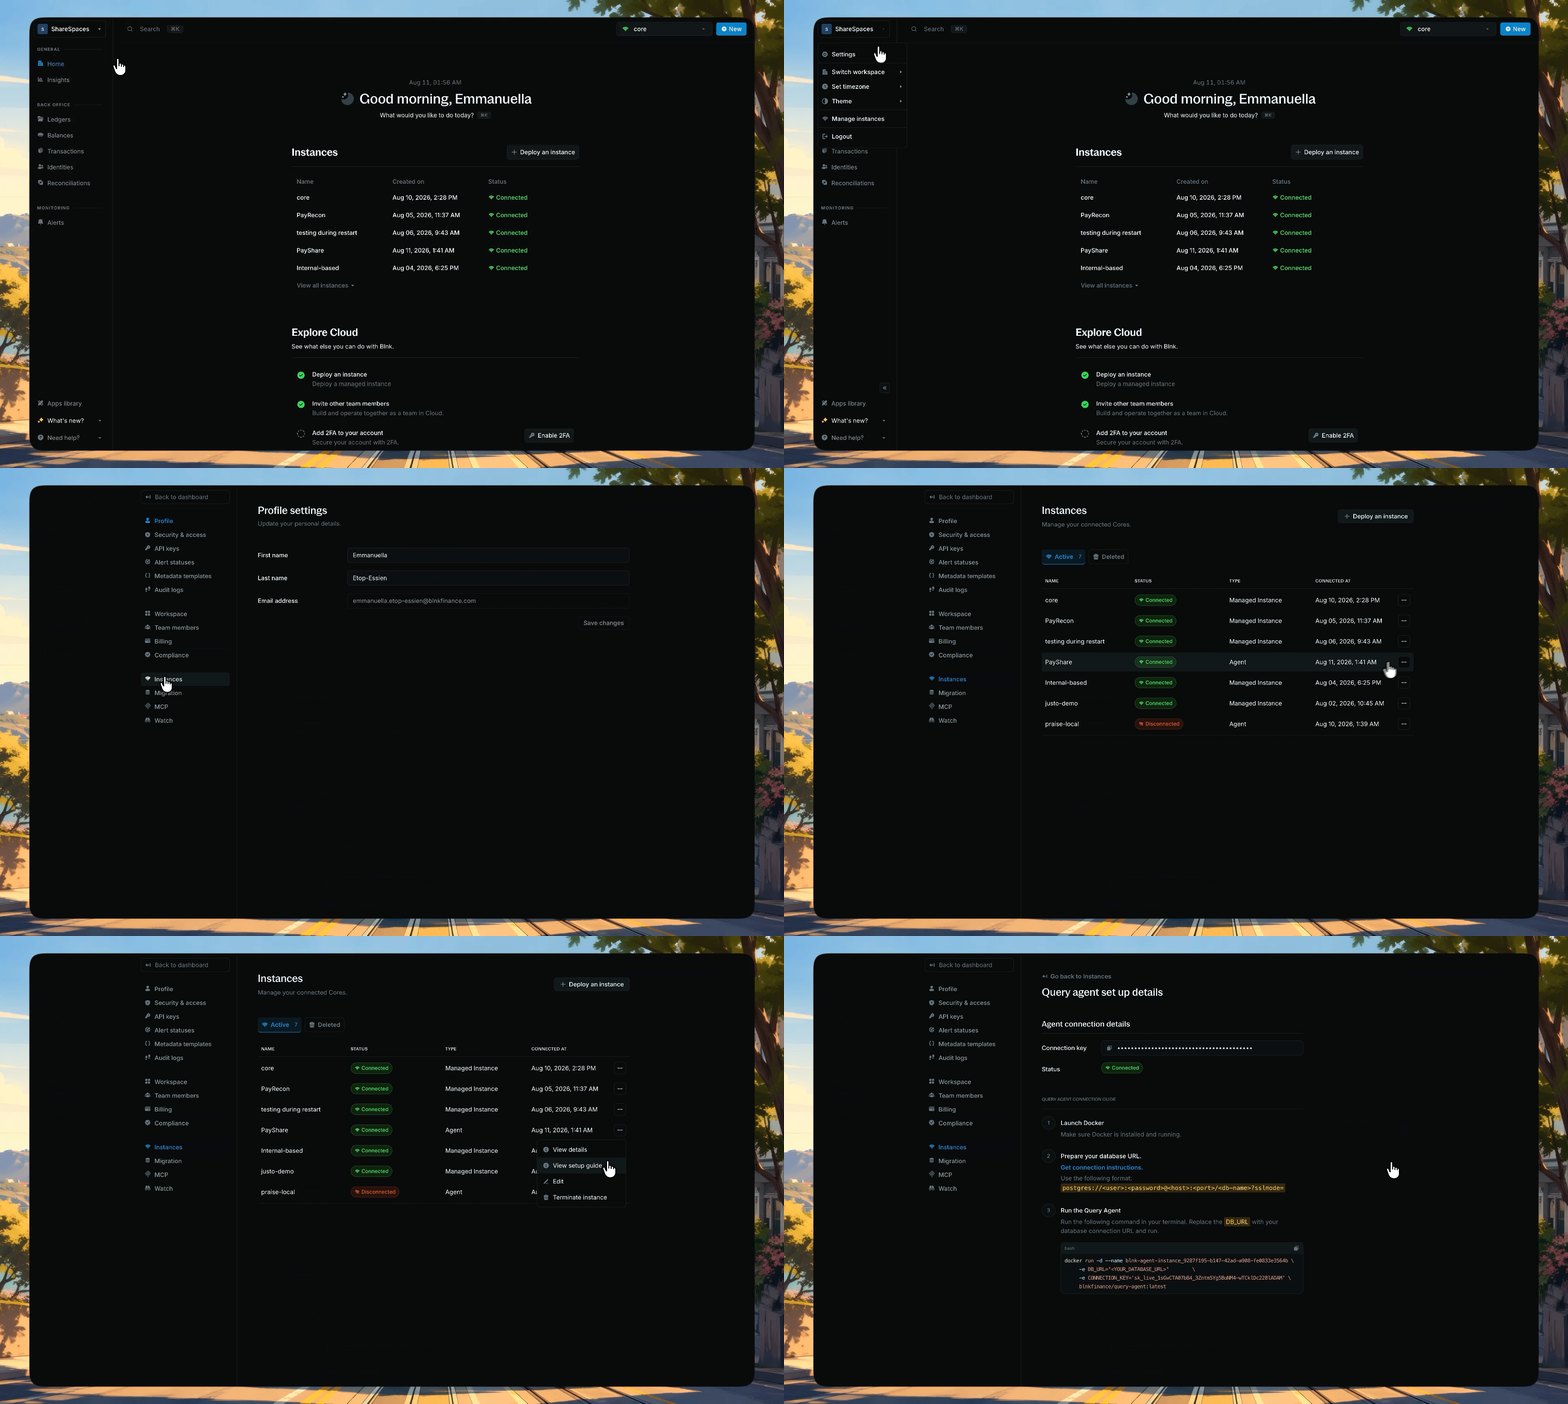
Open View setup details to see your connection key, setup steps, and connection status
Monitor connection health
HTTP_PORT environment variable.View logs and resource usage
Update the Query Agent
-e HTTP_PORT=<port> and publish the same container port with -p <host-port>:<port> when restarting.Stop the Query Agent
Delete an instance
Open the actions list and click Delete instance. Follow the instructions in the modal to complete the action.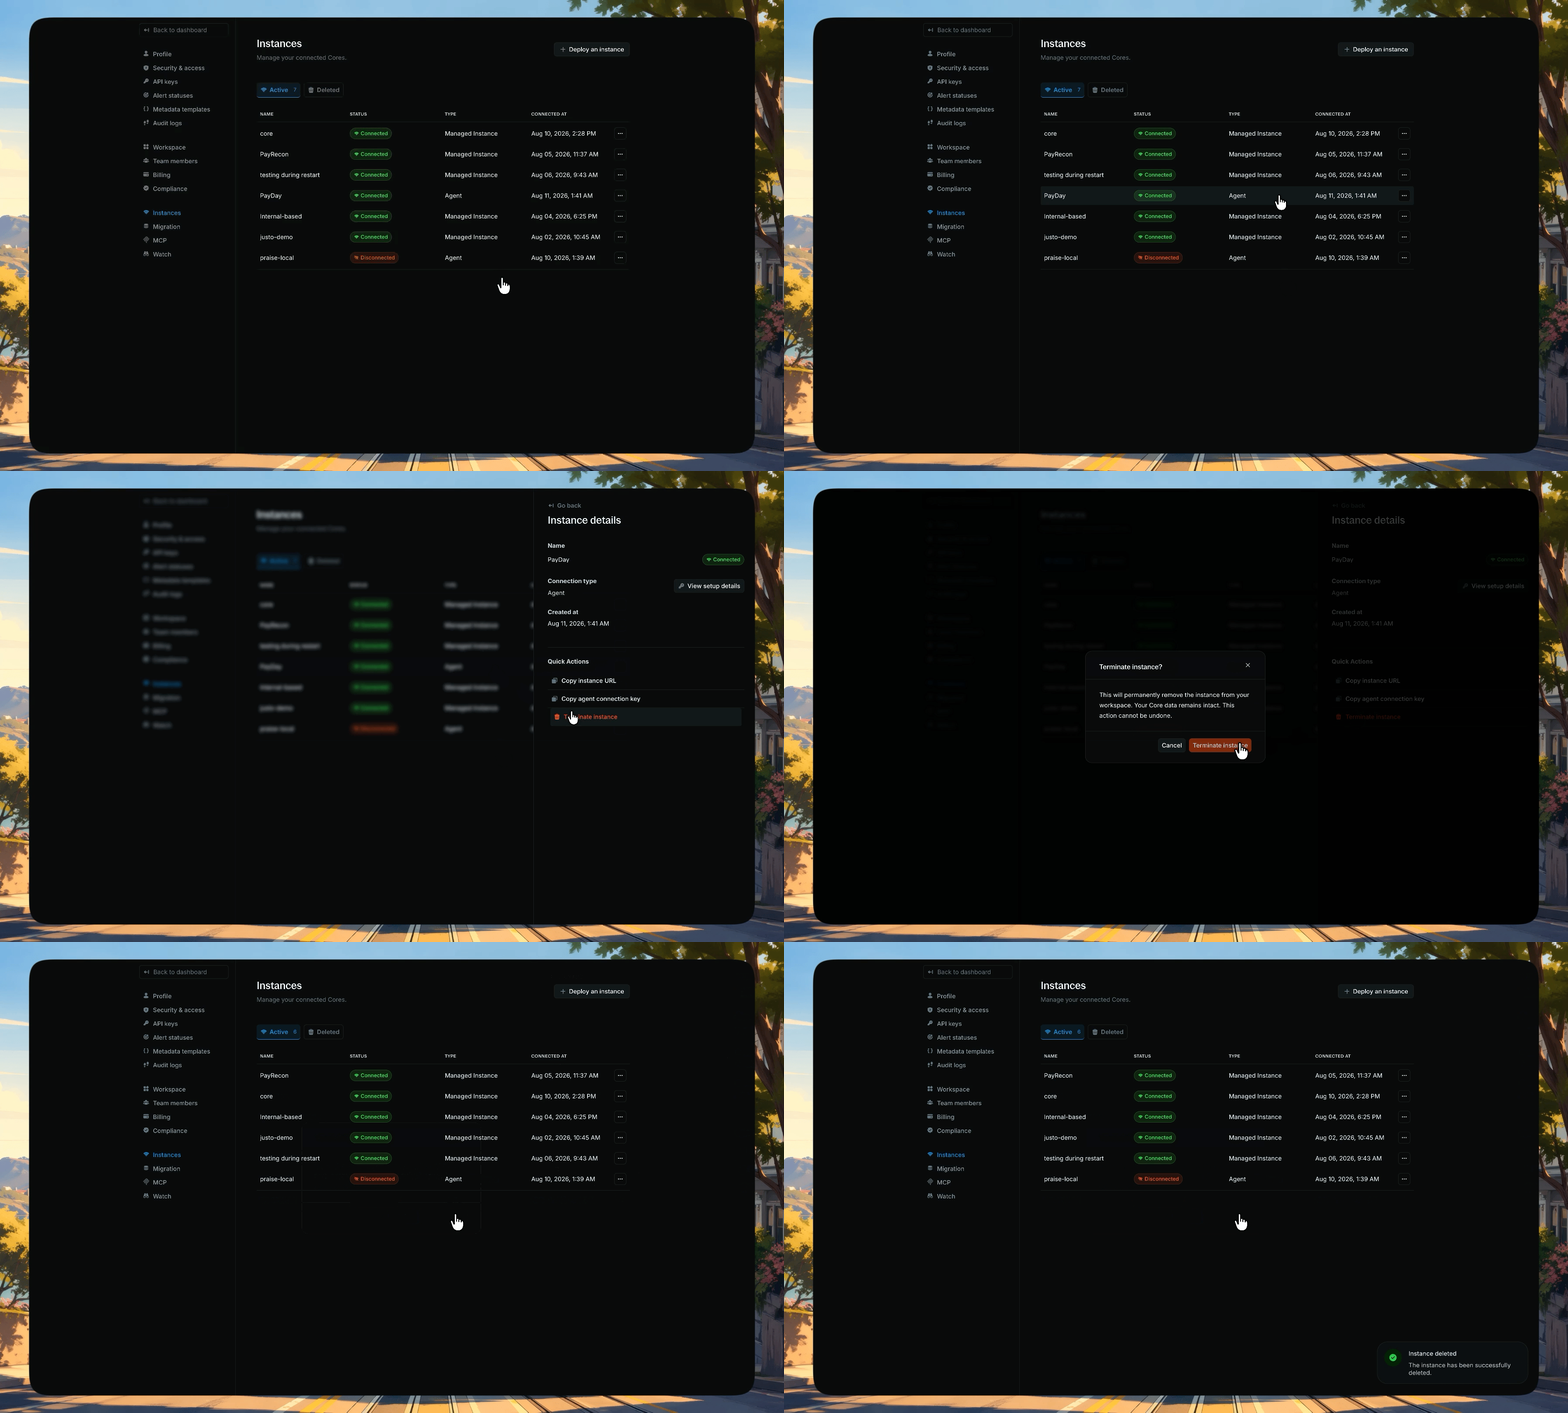
Open the actions list and click Delete instance
Performance optimization for Core 0.12.1 or lower
If you’re running Blnk Core version 0.12.1 or lower, you need to apply database indexes to significantly improve query performance and speed up your Blnk Cloud workspace.Connect to your PostgreSQL database
Apply the database indexes
Deploy components in the same region
- Keep Core and the PostgreSQL database (and other services) in the same region: Deploy your Core instance, PostgreSQL database, and any other related services within the same geographical region to minimize latency.
- Keep the Query Agent in the same region as the database: Ensure your Query Agent is deployed in the same region as your PostgreSQL database to reduce query latency and improve connection speed.
Verify the improvements
FAQs
Trouble connecting to your database locally?
Trouble connecting to your database locally?
- If you’re running PostgreSQL inside Docker (on a Mac/Linux), use
host.docker.internalas the host in your database URL. - For Windows, run the Query Agent container on the same network as your database container. Learn more
- If you’re running PostgreSQL directly on your machine, use
localhostas the host in your database URL. - Ensure PostgreSQL is running and accessible.
- Check that the port (default: 5432) is correct.
- Verify your database credentials are correct.
Database connection failed?
Database connection failed?
- Verify the database URL format is correct.
- Ensure the database host is accessible from your Docker host.
- Check that the database user has proper read permissions.
- Verify network connectivity allows database connections.
- Ensure SSL mode is correctly configured.
Docker container won't start
Docker container won't start
- Verify Docker is running:
docker --version - Check if port conflicts exist:
docker ps - Ensure environment variables are properly formatted.
- Review Docker logs:
docker logs blnk-agent --tail 50
Instance authentication failed
Instance authentication failed
- Verify the instance URL is accessible and responding.
- Verify the instance secret key is correctly copied.
- Ensure SSL certificate is valid if using HTTPS.
- Confirm the instance is running and accepting connections.
- Test instance connectivity:
curl -H "Authorization: Bearer YOUR_SECRET_KEY" https://your-instance-url/health