

Branch an instance
1
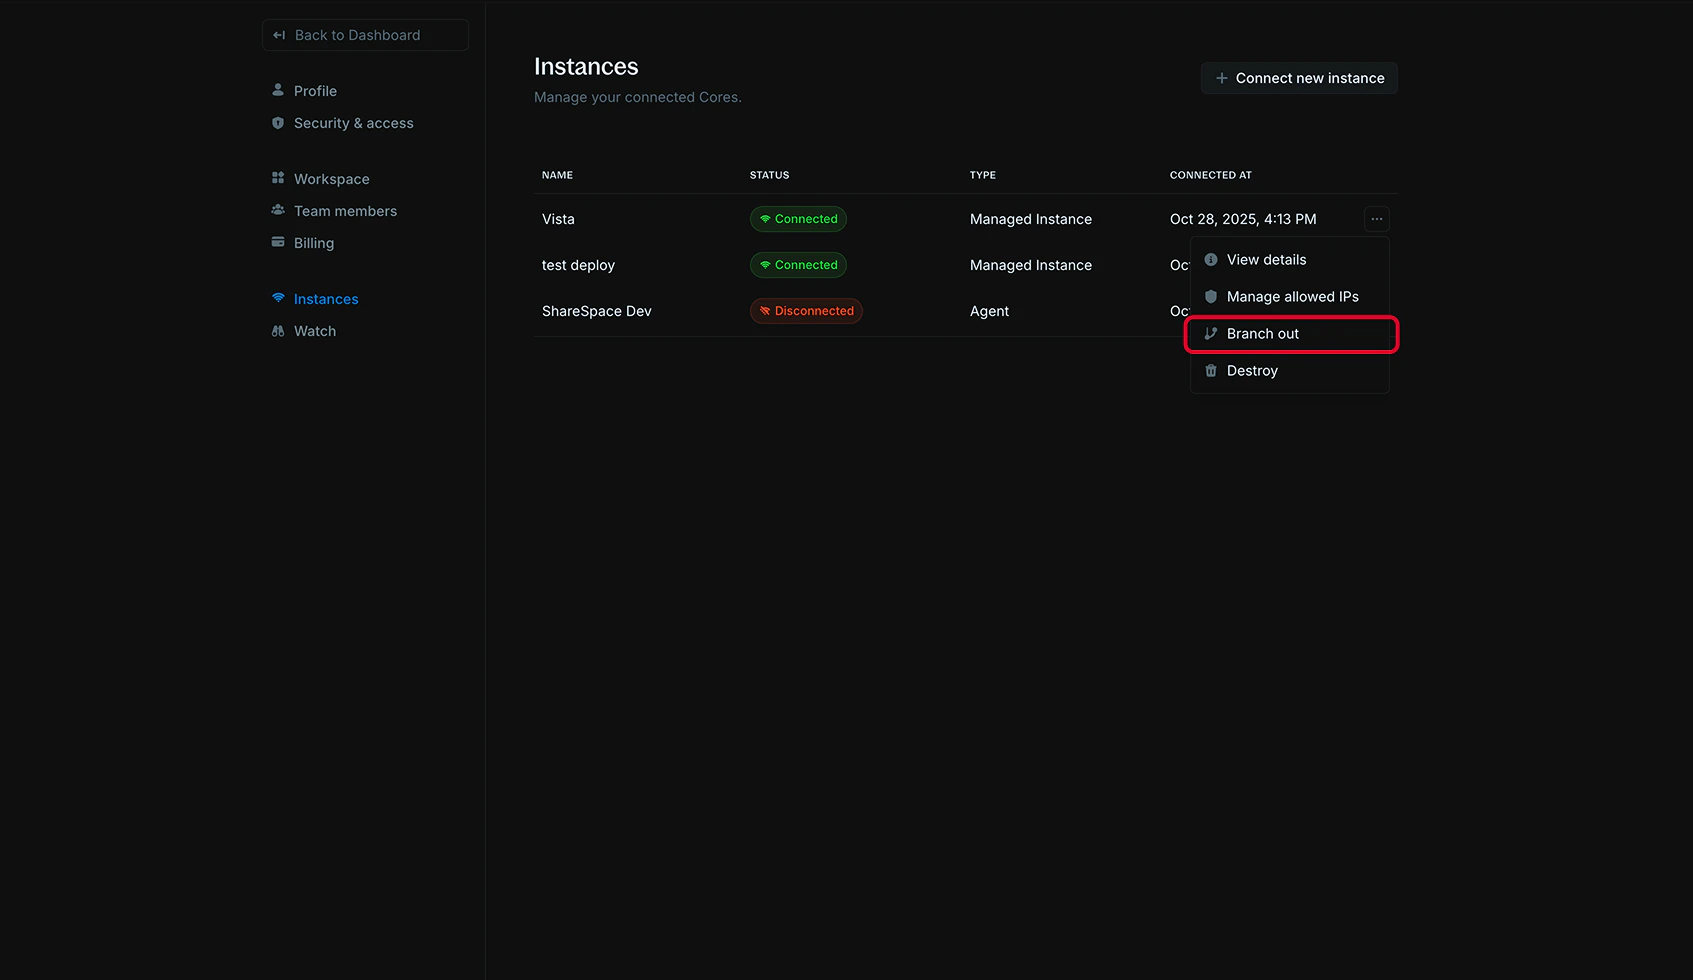
Open instance actions
- In your Blnk Cloud workspace, go to
Settings > Instances; - Find the instance you want to branch from;
- Click the actions menu (three dots) next to the instance;
- Click
Branch out.
2
Provide instance details
- Enter a descriptive Instance name for your branch (e.g., “Production - Test”, “Staging - Feature X”);
- Optionally, select a
Restore pointto create the branch from a specific point in time:- Use the date picker to select a date (up to 7 days back);
- Use the time picker to select the exact time.
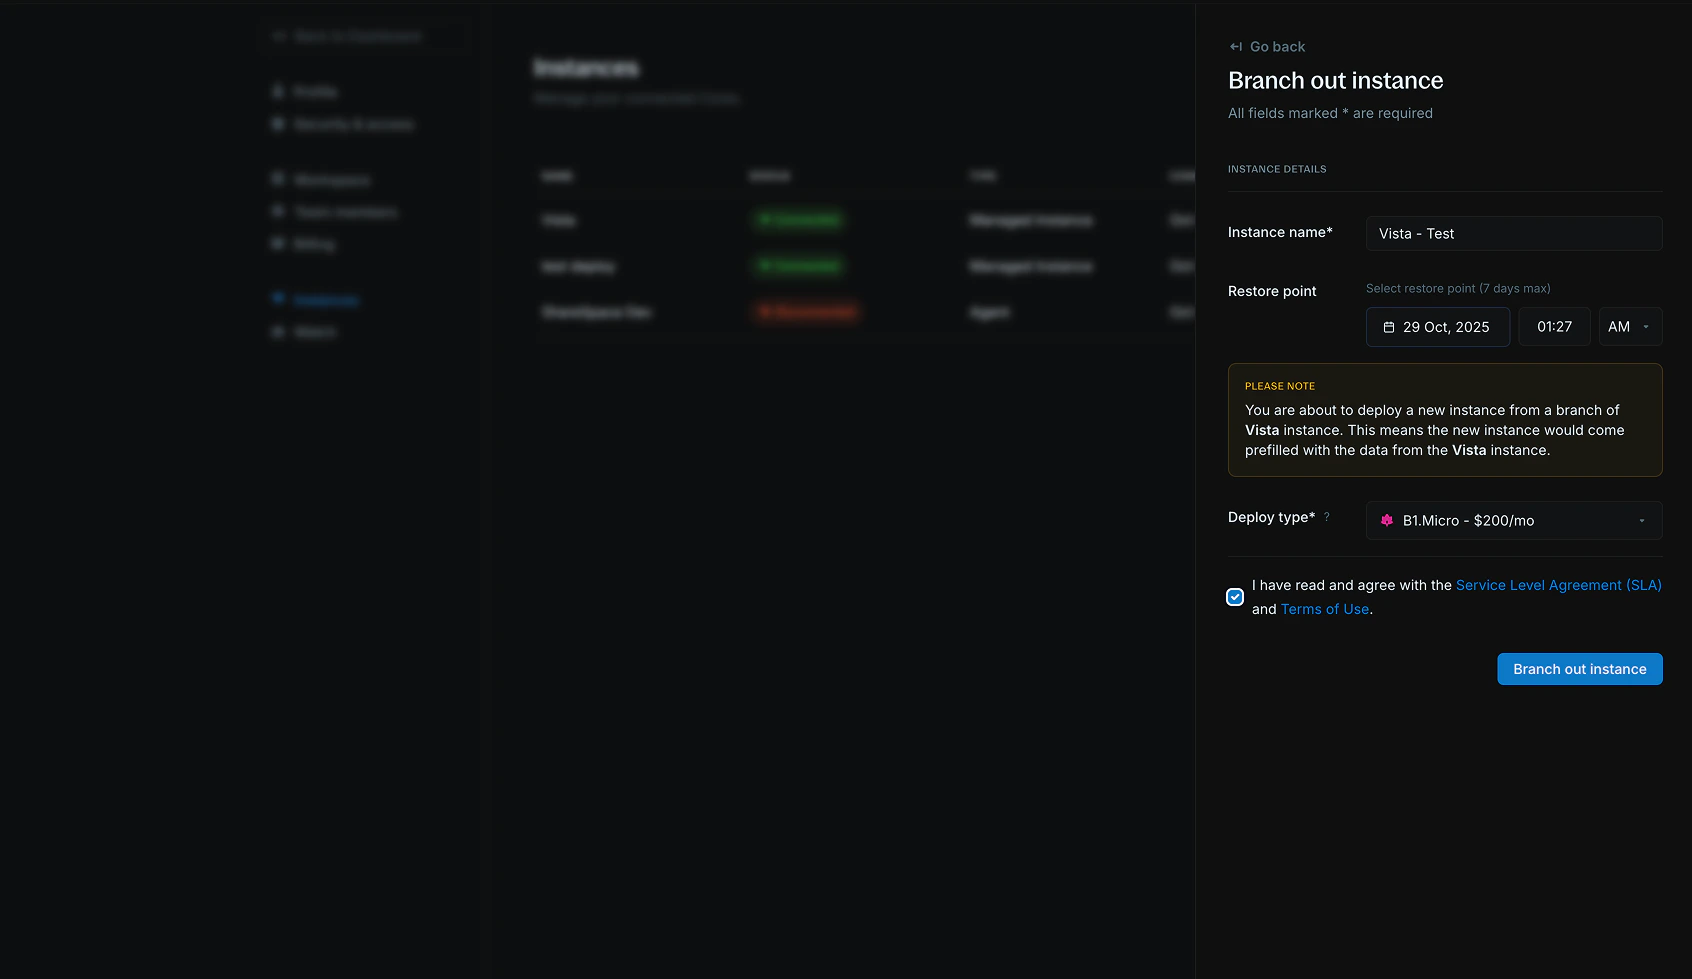
If you don’t select a restore point, the branch will be created with the current data from the parent instance.
3
Configure deployment
- Select the
Deploy typefor your branch instance; - Click
Branch out instance.
4
Verify branch creation
It takes about 7-10 minutes to create your branch instance. When ready, the connection status updates to
Connected and you can start using your branched instance.The new instance will appear in your Settings > Instances list with the name you provided.Use cases
Branching is useful for a variety of scenarios where you need isolated copies of your instance data:Test product launches in isolation:Create a branch to test new features or product launches without affecting your main instance.- Run reconciliation: Use branches to perform reconciliation processes on historical data without impacting live operations.
Create copies for other teams:Share isolated instances with different teams for development, testing, or analysis purposes.- Run insights & analytics: Generate reports and analytics on historical data without affecting your production environment.
Compliance auditing:Create branches for compliance reviews and audits on historical data states.- Performance testing: Run load tests and performance analysis on isolated copies of your production data.
- Data migration validation: Test data migration scripts and processes before applying them to production.