

Why are Maps important?
Your map acts as your engineering team’s blueprint for implementing your Ledger, ensuring data consistency and accuracy. A well-designed map transforms your ledger into a reliable source of truth, empowering teams across your organization-whether in finance, operations, or strategy-to confidently rely on its data for informed decisions, trend analysis, and compliance. This foundational clarity allows you to leverage the ledger for diverse purposes, including reporting, reconciliation, and business intelligence. Additionally, it can support critical accounting tasks such as generating balance sheets, profit and loss statements, and tracking the general ledger.Key design principles
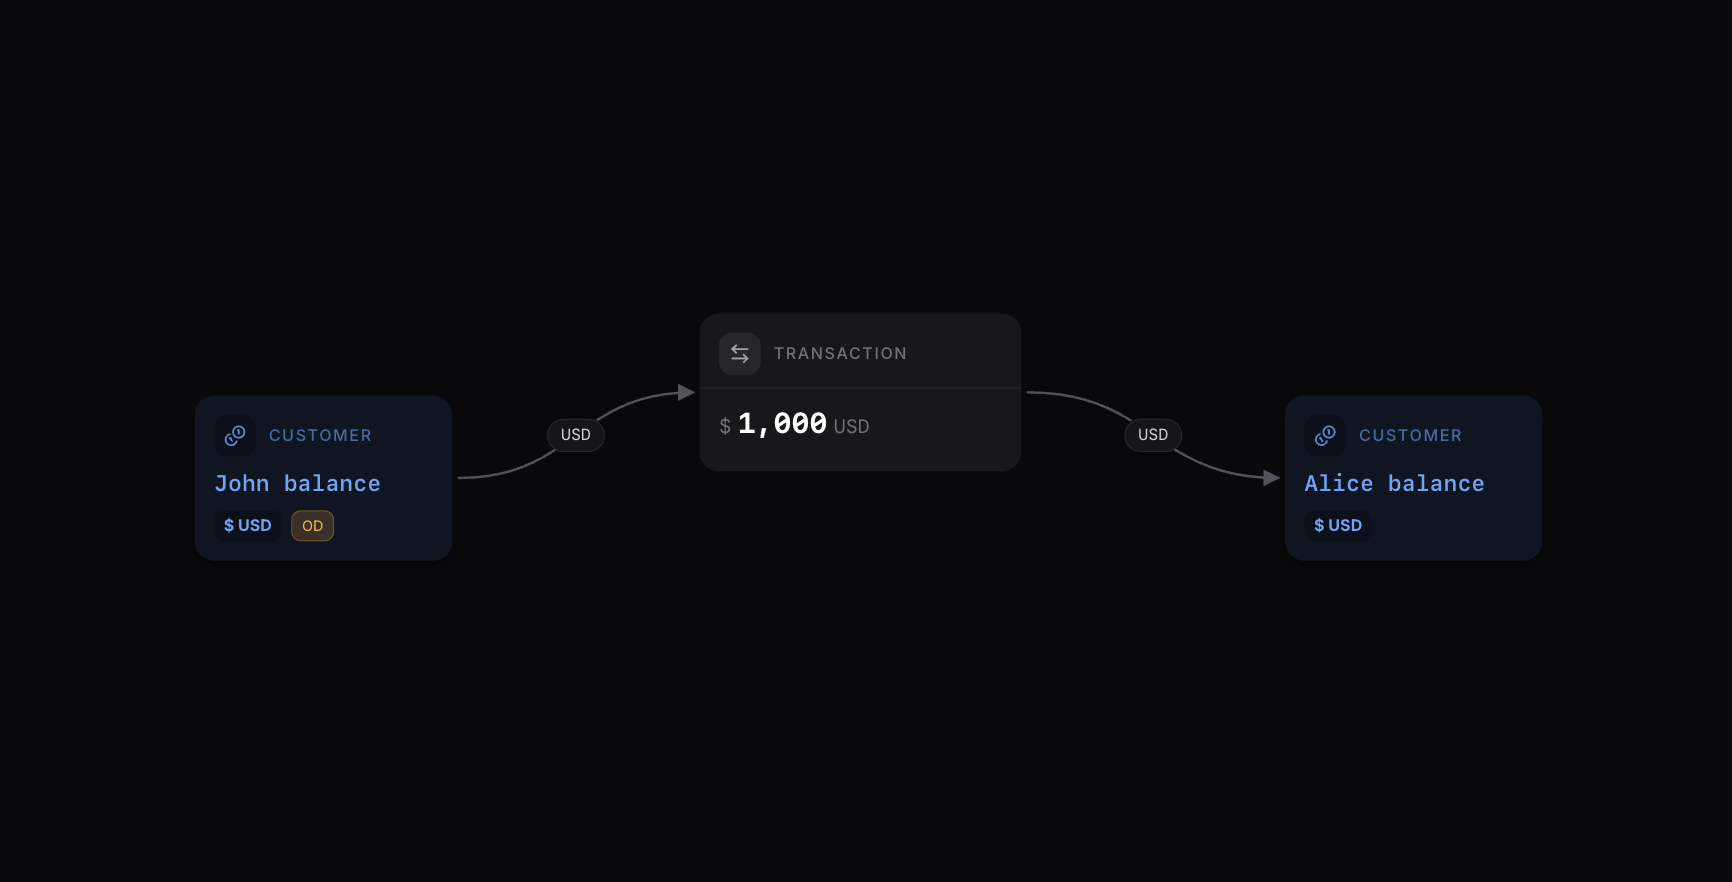
There are two key principles to keep in mind when designing your map:- Double-entry principle: Every movement of money always has two sides-a source where the money is deducted and a destination where it is credited. Source and destination are represented with balances in Blnk.
- Clarity of flow (Uni-directional principle): Money should always be represented as moving in a clear, single direction-from source to destination-without ambiguity or circular references. This makes the map easy to interpret and ensures logical consistency.
This is not an exercise for developers alone - ledger design is serious business that needs consensus from several key stakeholders who rely on it for their own operations and workflows.
Designing our map
Maps are typically designed with:- Nodes (or circles): These represent entities or balances (e.g., accounts, wallets, or financial instruments where funds are stored).
- Edges (or arrows): These represent the connections or money movement between nodes (e.g., transactions, transfers, or flows of funds).
You can also view and interact with the full money movement map as you follow this guide.
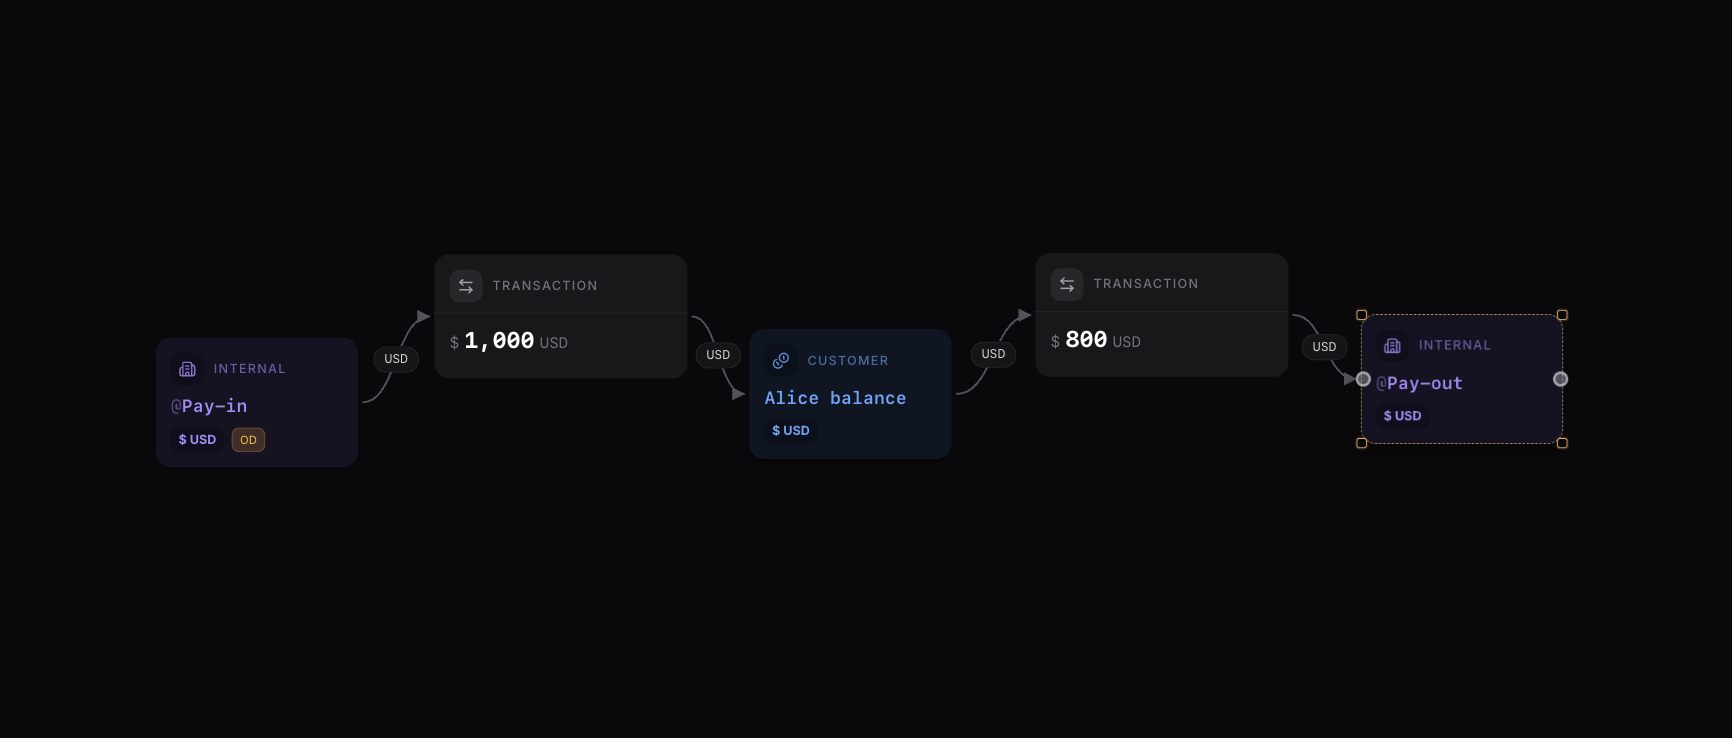
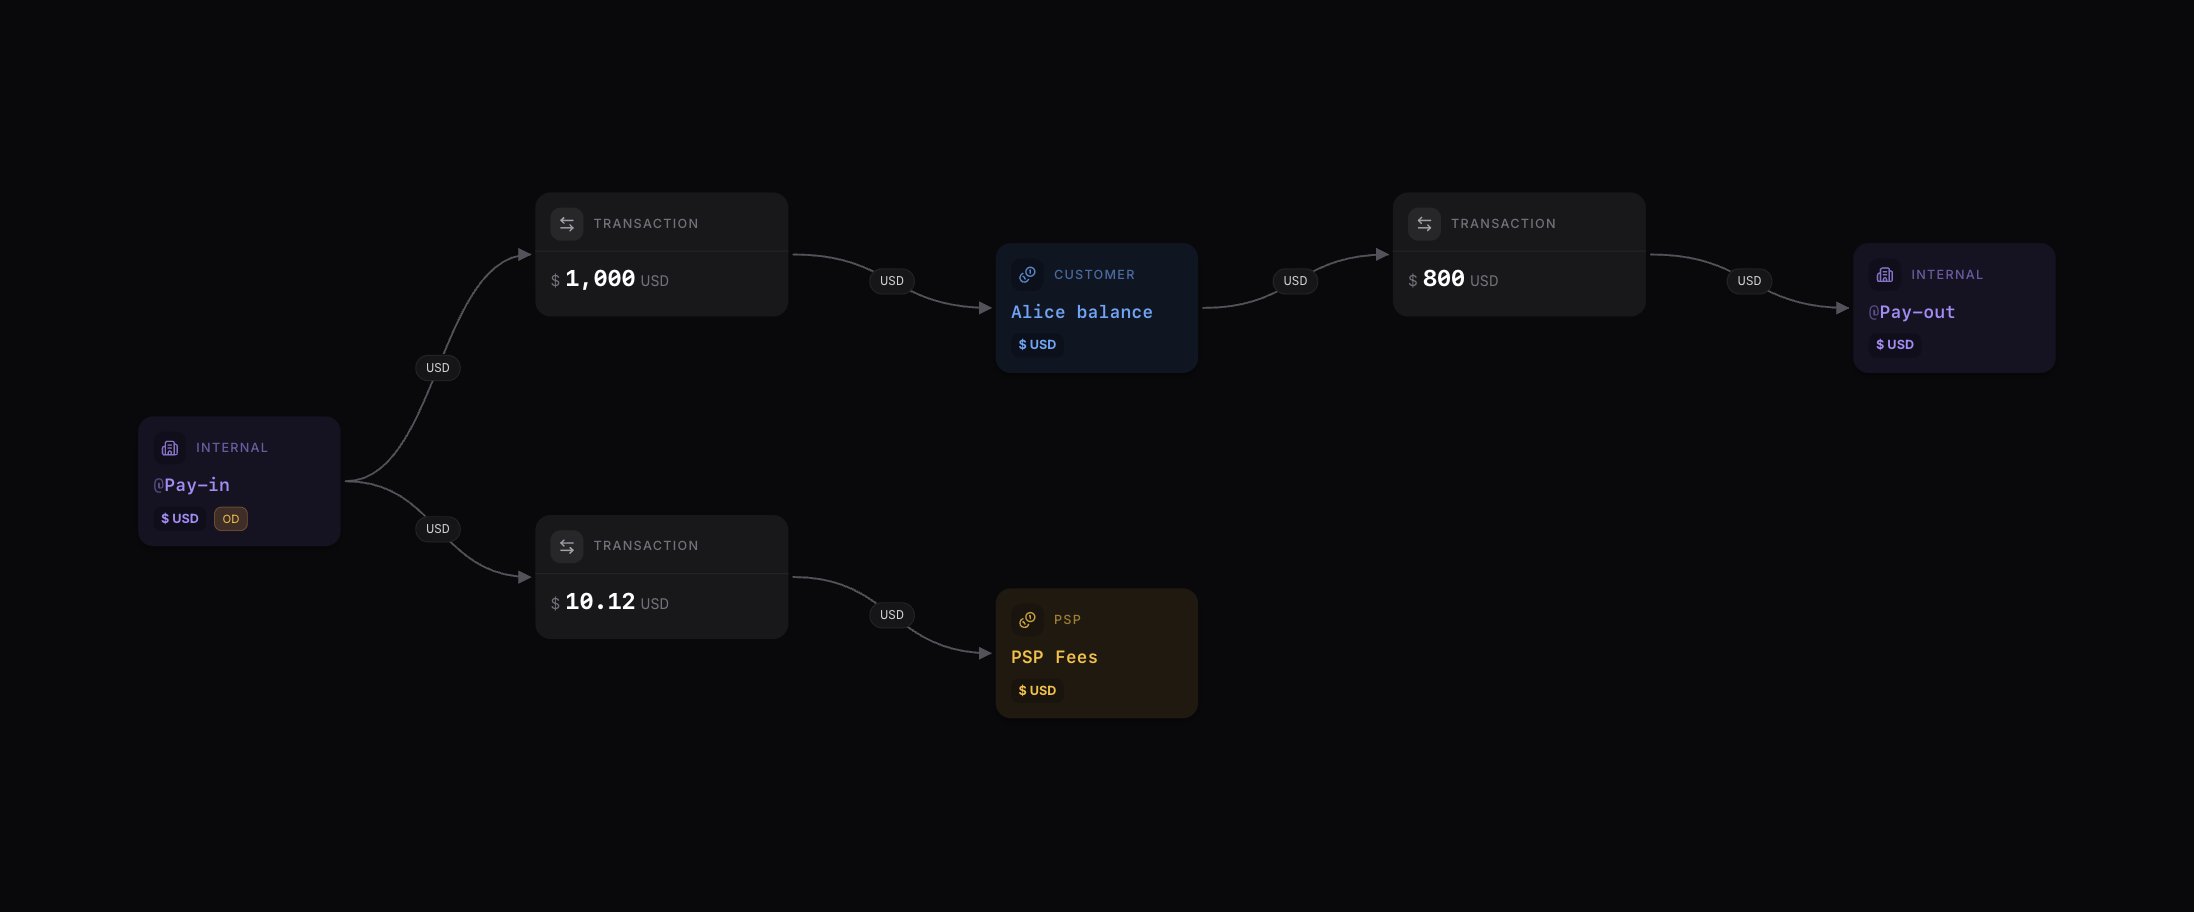
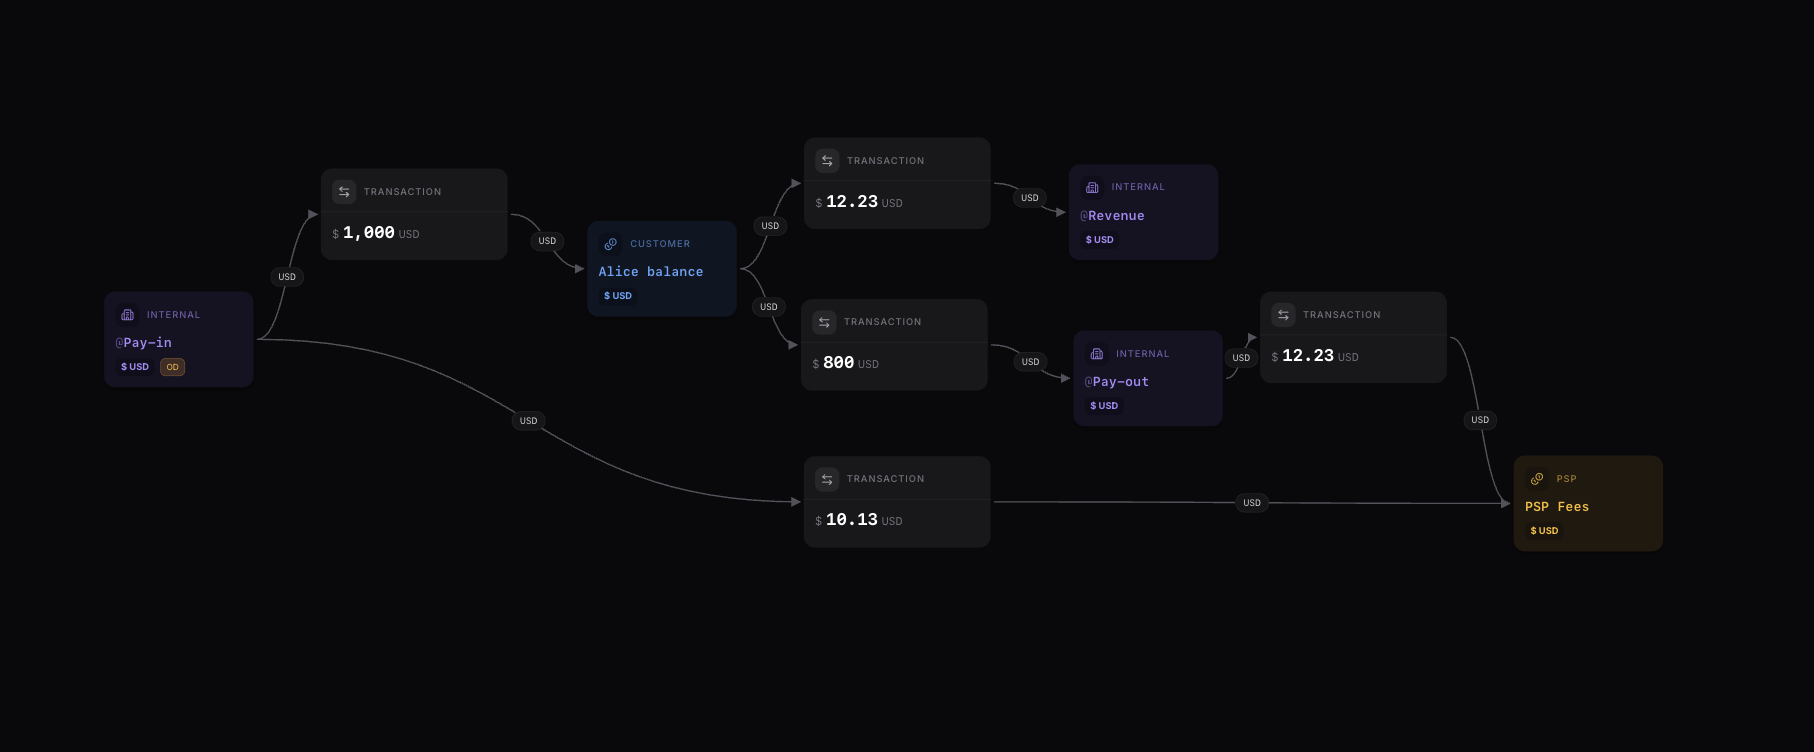
@Pay-in represents “outside” for deposits, and @Pay-out represents “outside” for payouts.
Let’s add some more details.
When a customer deposits money in their wallet, your Pay-in provider charges you a processing fee, but you don’t pass it to the customer. You pay this fee from your company account.
-
The Pay-in provider fee paid from your company account doesn’t create a dedicated node for the account. Instead, we track this fee as money coming from “outside” directly into the
@PSP Feesbalance. This keeps the map focused while still accounting for the expense. - Only nodes essential to the flow of funds in the system are included in this map. This ensures the design remains simple, clear, and easy to manage.
-
@Pay-inand@Pay-outonly represents source and destination when money is coming into and going out of our system respectively.
Our map in summary
-
The deposit flow:
- Pay-in provider credits the full amount to customer’s wallet.
- Pay-in provider charges you a fee (shown as flow to
@PSP Fees). - Pay-in provider periodically settles to your settlement account manually.
-
The payout flow:
- Customer initiates a payout with amount plus all fees.
- Your fee goes to revenue.
- Provider’s fee goes to
@PSP Fees. - The actual payout amount is debited from your payout account.
Our ledger architecture
Using the money movement map above, our Blnk Ledger will look like this:| Ledger | Balances |
|---|---|
| General Ledger | @Pay-in @Pay-out @PSP Fees @Revenue |
| Customer Wallets Ledger | customer-wallet-1 customer-wallet-2 customer-wallet-3 customer-wallet-n |
- Match individual deposits between
@Pay-inand customer balances. - Match individual payouts between customer balances and
@Pay-out. - Auto-detect mismatches in transaction amounts between provider statements and customer balances.
Build your own Map
Every financial product has unique characteristics that shape how money moves in its system. There’s no universal approach to building a money movement map - the ideal structure depends on your specific product features, operational processes, and team requirements.Open the Blnk Map builder
Design and share fund flows before build.