This guide walks you through adding the Blnk Java SDK to your project, initializing the client, and creating your first transaction. By the end, you’ll have a working connection to Blnk and be ready to build financial products from your Java application.
1

Install the SDK

Add the dependency from Maven Central. Requires JDK 17 or later.
pom.xml
Gradle:
2

Create a sample class

Create a Main.java file as shown below to create your first transaction with the SDK.
Make sure you have a running Blnk Core instance. Set the URL and API key as environment variables in your project.
Main.java
3

Execute the class

Compile and run.
You should get a response similar to:
201 Created
4

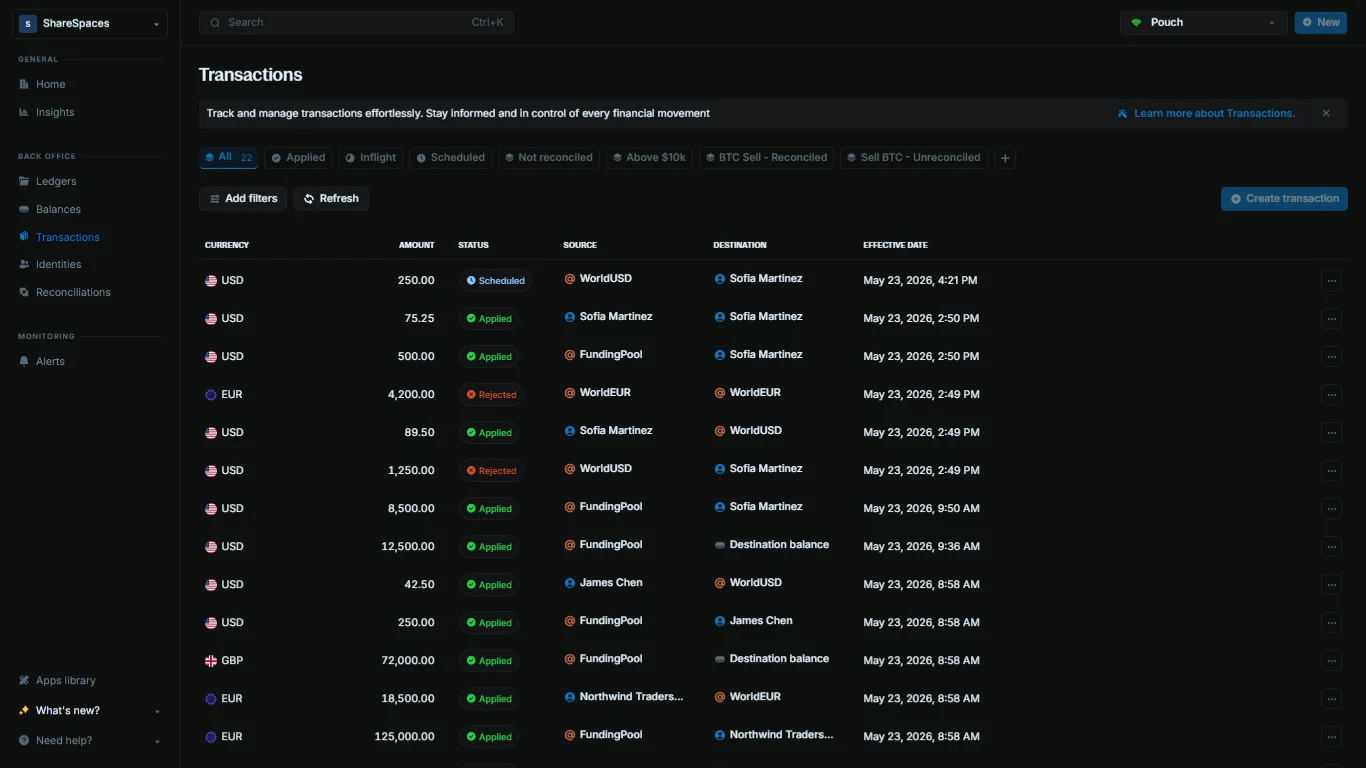
View the transaction

Confirm the transaction landed in your ledger.
  1. Open Transactions in the sidebar.
  2. Find your transaction by reference (first_txn_001) or by the transaction_id from the script output.
  3. Click the row to open the details and verify the amount, status, source, and destination.
Blnk Cloud Transactions table with reference, amount, status, source, and destination columns

The Transactions table shows every transaction synced from your Core instance.

If the transaction is missing, click Refresh on the table to pull the latest data from Core.

Using the SDK

Authentication, timeouts, retries, and logging.

Error handling

ApiResponse checks and Core error bodies.

Changelog

Java SDK releases and version history.

Need help?

We are very happy to help you make the most of Blnk, regardless of whether it is your first time or you are switching from another tool. To ask questions or discuss issues, please contact us or join our Discord community.