> ## Documentation Index
> Fetch the complete documentation index at: https://docs.blnkfinance.com/llms.txt
> Use this file to discover all available pages before exploring further.
# OAuth
> Learn how to create OAuth clients and get access tokens for Blnk Cloud APIs.
export const CtaCallout = props => {
const {title, buttonLabel, href, trackingEvent, buttonTarget, rel = "noopener noreferrer", children} = props;
const handleCtaClick = () => {
if (typeof window === "undefined" || !trackingEvent) {
return;
}
try {
window.dispatchEvent(new CustomEvent("blnk:docs-cta", {
detail: {
name: trackingEvent,
href
}
}));
} catch {}
try {
window.posthog?.capture?.(trackingEvent, {
href
});
} catch {}
const gaPayload = {
cta_href: href
};
try {
window.gtag?.("event", trackingEvent, gaPayload);
} catch {}
try {
window.dataLayer = window.dataLayer || [];
window.dataLayer.push({
event: trackingEvent,
...gaPayload
});
} catch {}
};
const isExternal = typeof href === "string" && (/^https?:\/\//i).test(href);
const target = buttonTarget ?? (isExternal ? "_blank" : undefined);
const linkRel = isExternal ? rel : undefined;
return ;
};
OAuth clients provide secure authentication for MCP and third-party integrations to access Blnk. To manage your OAuth clients, go to [Settings > API Keys](https://cloud.blnkfinance.com/cloud/settings/api-keys).
Each OAuth client has:
* **Name:** A user-friendly identifier to help you organize and identify clients
* **Client ID:** A public identifier for your OAuth client
* **Client Secret:** A secret credential used for authentication (shown only once at creation)
* **Scopes:** Permissions that define what the client can access (e.g., `*` for all permissions, or specific scopes like `mcp:read`, `proxy:write`, or `data:read`)
* **Expiration:** Optional expiration date, or "Never" for clients that don't expire
***
## Create an OAuth client
1. Go to `Settings > API Keys` in your Blnk Cloud dashboard.
2. Click `Create API Key` button in the top-right corner of the API Keys page.
Fill in the required information:
1. **Name:** Enter a descriptive name for your OAuth client (e.g., "Production OAuth Client", "MCP Integration")
2. `Type:` Select `OAuth` (instead of API Key)
3. `Scopes:` Select the permissions for this client:
* `*` for all permissions
* Specific scopes like `mcp:read`, `proxy:write`, or `data:read` for limited access
4. `Expires:` Choose when the client should expire:
* Select a specific date
* Choose "Never" for clients that don't expire
After creating the client, your Client ID and Client Secret will be displayed **only once**. Copy both immediately and store them securely.
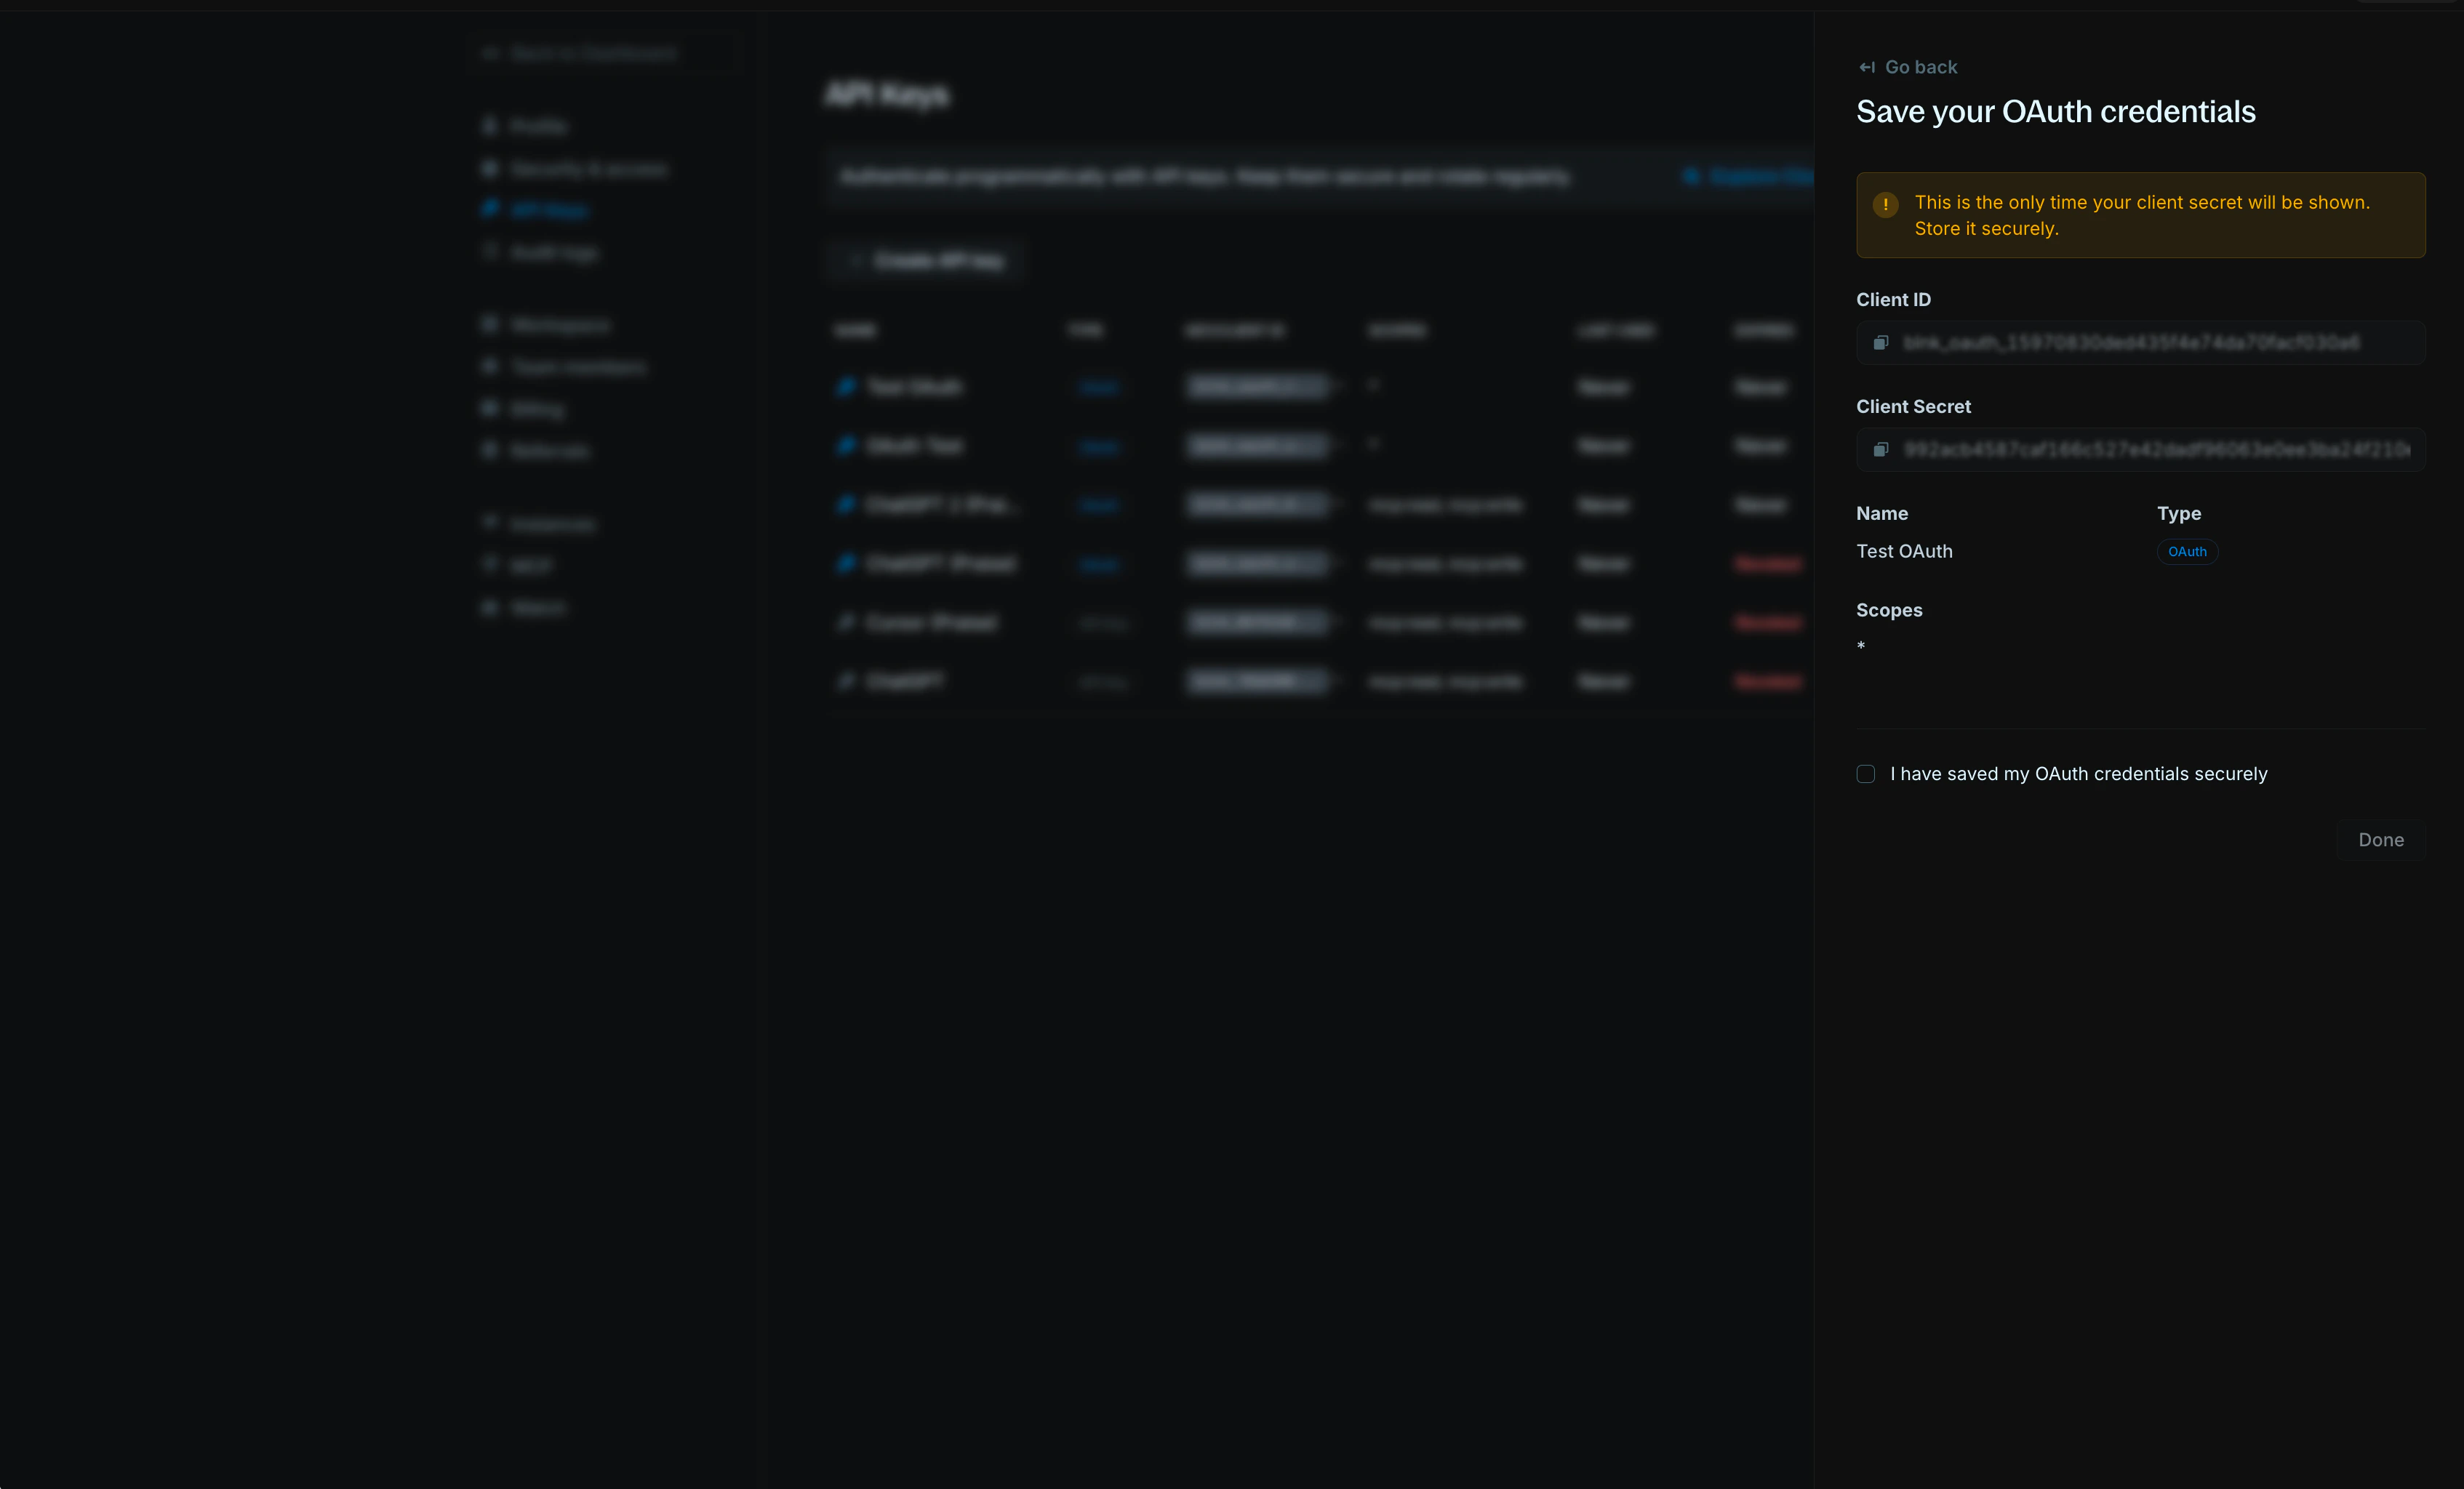 `You cannot retrieve the Client Secret after creation.` If you lose the secret, you must create a new OAuth client.
***
## Get an access token
For third-party integrations, you'll need to an access token to interact with the user's Cloud workspace via the [Cloud Proxy](/cloud/proxy/proxy-api) and [Data APIs](/cloud/proxy/data-api).
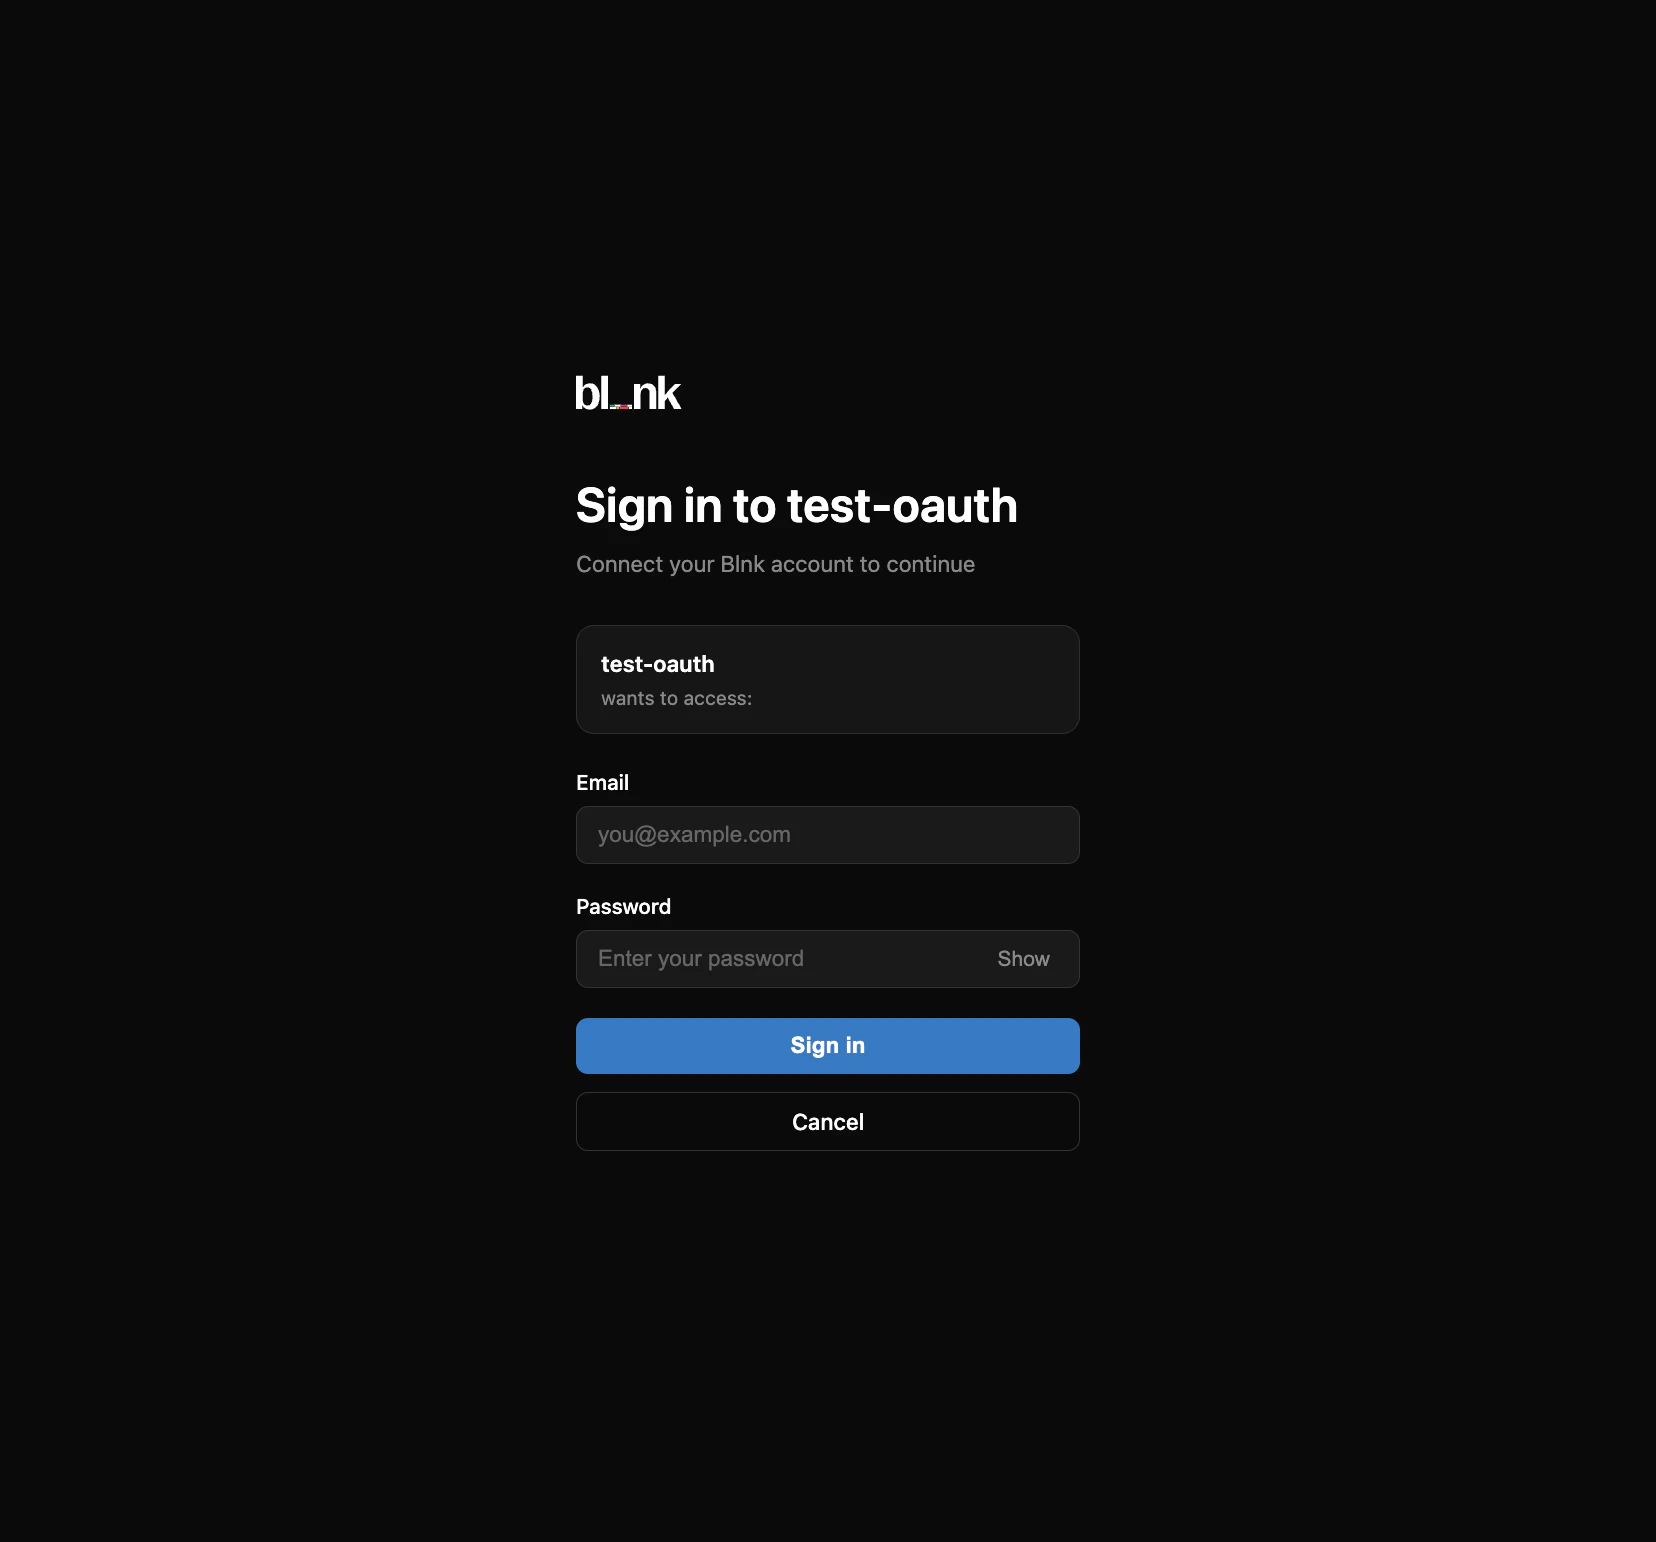
Redirect the user's browser to the Blnk authorization URL to log in:
```bash Authorization URL wrap theme={"system"}
https://api.cloud.blnkfinance.com/oauth/authorize?response_type=code&client_id=YOUR_CLIENT_ID&redirect_uri=https://your-app.com/oauth/callback
```
Replace:
* `YOUR_CLIENT_ID`: Your OAuth client ID.
* `redirect_uri`: Your app's callback URL (for example, `https://your-app.com/oauth/callback`). This must match exactly when you exchange the code.
`You cannot retrieve the Client Secret after creation.` If you lose the secret, you must create a new OAuth client.
***
## Get an access token
For third-party integrations, you'll need to an access token to interact with the user's Cloud workspace via the [Cloud Proxy](/cloud/proxy/proxy-api) and [Data APIs](/cloud/proxy/data-api).
Redirect the user's browser to the Blnk authorization URL to log in:
```bash Authorization URL wrap theme={"system"}
https://api.cloud.blnkfinance.com/oauth/authorize?response_type=code&client_id=YOUR_CLIENT_ID&redirect_uri=https://your-app.com/oauth/callback
```
Replace:
* `YOUR_CLIENT_ID`: Your OAuth client ID.
* `redirect_uri`: Your app's callback URL (for example, `https://your-app.com/oauth/callback`). This must match exactly when you exchange the code.
 After the user signs in, Blnk redirects back to your app with an authorization code:
```bash Redirect back wrap theme={"system"}
https://your-app.com/oauth/callback?code=THE_AUTH_CODE
```
Call the token endpoint with the authorization code and your OAuth client credentials:
```bash cURL wrap theme={"system"}
curl -X POST "https://api.cloud.blnkfinance.com/oauth/token" \
-H "Content-Type: application/x-www-form-urlencoded" \
-u "YOUR_CLIENT_ID:YOUR_CLIENT_SECRET" \
-d "grant_type=authorization_code" \
-d "code=THE_CODE_FROM_REDIRECT" \
-d "redirect_uri=https://your-app.com/oauth/callback"
```
```json 200 OK {2,5} theme={"system"}
{
"access_token": "blnk_at_...",
"token_type": "Bearer",
"expires_in": 3600,
"refresh_token": "blnk_rt_...",
"scope": "data:read data:write proxy:write"
}
```
When the access token expires, use its refresh token to get a new one:
```bash cURL wrap theme={"system"}
curl -X POST "https://api.cloud.blnkfinance.com/oauth/token" \
-H "Content-Type: application/x-www-form-urlencoded" \
-u "YOUR_CLIENT_ID:YOUR_CLIENT_SECRET" \
-d "grant_type=refresh_token" \
-d "refresh_token=blnk_rt_YOUR_REFRESH_TOKEN_HERE"
```
***
## Use the access token with Cloud APIs
Include your access token in the `Authorization` header for Cloud API requests:
```bash Example request wrap theme={"system"}
curl -X GET "https://api.cloud.blnkfinance.com/data/ledgers?instance_id=YOUR_INSTANCE_ID" \
-H "Authorization: Bearer blnk_at_YOUR_ACCESS_TOKEN"
```
***
## Find and use the instance ID
To route requests to the correct Blnk Core instance, include `instance_id` as a query parameter on every Proxy/Data API request.
1. Log in to **Blnk Cloud**.
2. Open the `Instances` page (your list of instances can be seen on the home page or `Settings > Instances`).
3. Find the Blnk Core instance you want to use.
4. Click on the instance to open the details modal.
5. Copy its **Instance ID** (for example, `instance_01ABC...`).
Include `instance_id` in every request to target the correct Core instance:
```bash Example request wrap theme={"system"}
curl -X GET "https://api.cloud.blnkfinance.com/proxy/ledgers?instance_id=YOUR_INSTANCE_ID" \
-H "Authorization: Bearer blnk_at_YOUR_ACCESS_TOKEN" \
-H "Content-Type: application/json"
```
***
## Revoke an OAuth client
If you need to disable an OAuth client without deleting it permanently, you can revoke it. Revoked clients cannot be used for authentication but remain visible in your API Keys list for reference.
Click on the OAuth client name in the API Keys table to view its details.
In the client details panel, click the `Revoke Key` button.
Revoking a client will immediately disable it. Any applications or integrations using this client will stop working until you create and configure a new client.
Confirm that you want to revoke the client. The client's status will change to **"Revoked"** in the API Keys table.
***
## Next steps
Create ledger records via Cloud APIs.
Query and filter financial data.
***
## Need help?
We are very happy to help you make the most of Blnk, regardless of whether it is your first time or you are switching from another tool.
To ask questions or discuss issues, please [contact us](mailto:support@blnkfinance.com) or [join our Discord community](https://discord.gg/7WNv94zPpx).
Get dedicated support for architecture reviews, integration planning, ledger workflows, and production deployment.
After the user signs in, Blnk redirects back to your app with an authorization code:
```bash Redirect back wrap theme={"system"}
https://your-app.com/oauth/callback?code=THE_AUTH_CODE
```
Call the token endpoint with the authorization code and your OAuth client credentials:
```bash cURL wrap theme={"system"}
curl -X POST "https://api.cloud.blnkfinance.com/oauth/token" \
-H "Content-Type: application/x-www-form-urlencoded" \
-u "YOUR_CLIENT_ID:YOUR_CLIENT_SECRET" \
-d "grant_type=authorization_code" \
-d "code=THE_CODE_FROM_REDIRECT" \
-d "redirect_uri=https://your-app.com/oauth/callback"
```
```json 200 OK {2,5} theme={"system"}
{
"access_token": "blnk_at_...",
"token_type": "Bearer",
"expires_in": 3600,
"refresh_token": "blnk_rt_...",
"scope": "data:read data:write proxy:write"
}
```
When the access token expires, use its refresh token to get a new one:
```bash cURL wrap theme={"system"}
curl -X POST "https://api.cloud.blnkfinance.com/oauth/token" \
-H "Content-Type: application/x-www-form-urlencoded" \
-u "YOUR_CLIENT_ID:YOUR_CLIENT_SECRET" \
-d "grant_type=refresh_token" \
-d "refresh_token=blnk_rt_YOUR_REFRESH_TOKEN_HERE"
```
***
## Use the access token with Cloud APIs
Include your access token in the `Authorization` header for Cloud API requests:
```bash Example request wrap theme={"system"}
curl -X GET "https://api.cloud.blnkfinance.com/data/ledgers?instance_id=YOUR_INSTANCE_ID" \
-H "Authorization: Bearer blnk_at_YOUR_ACCESS_TOKEN"
```
***
## Find and use the instance ID
To route requests to the correct Blnk Core instance, include `instance_id` as a query parameter on every Proxy/Data API request.
1. Log in to **Blnk Cloud**.
2. Open the `Instances` page (your list of instances can be seen on the home page or `Settings > Instances`).
3. Find the Blnk Core instance you want to use.
4. Click on the instance to open the details modal.
5. Copy its **Instance ID** (for example, `instance_01ABC...`).
Include `instance_id` in every request to target the correct Core instance:
```bash Example request wrap theme={"system"}
curl -X GET "https://api.cloud.blnkfinance.com/proxy/ledgers?instance_id=YOUR_INSTANCE_ID" \
-H "Authorization: Bearer blnk_at_YOUR_ACCESS_TOKEN" \
-H "Content-Type: application/json"
```
***
## Revoke an OAuth client
If you need to disable an OAuth client without deleting it permanently, you can revoke it. Revoked clients cannot be used for authentication but remain visible in your API Keys list for reference.
Click on the OAuth client name in the API Keys table to view its details.
In the client details panel, click the `Revoke Key` button.
Revoking a client will immediately disable it. Any applications or integrations using this client will stop working until you create and configure a new client.
Confirm that you want to revoke the client. The client's status will change to **"Revoked"** in the API Keys table.
***
## Next steps
Create ledger records via Cloud APIs.
Query and filter financial data.
***
## Need help?
We are very happy to help you make the most of Blnk, regardless of whether it is your first time or you are switching from another tool.
To ask questions or discuss issues, please [contact us](mailto:support@blnkfinance.com) or [join our Discord community](https://discord.gg/7WNv94zPpx).
Get dedicated support for architecture reviews, integration planning, ledger workflows, and production deployment.