> ## Documentation Index
> Fetch the complete documentation index at: https://docs.blnkfinance.com/llms.txt
> Use this file to discover all available pages before exploring further.
# Register your Custom App
> Add your Custom App to the Apps library and configure the manifest, callbacks, portal URL, and permissions.
export const CtaCallout = props => {
const {title, buttonLabel, href, trackingEvent, buttonTarget, rel = "noopener noreferrer", children} = props;
const handleCtaClick = () => {
if (typeof window === "undefined" || !trackingEvent) {
return;
}
try {
window.dispatchEvent(new CustomEvent("blnk:docs-cta", {
detail: {
name: trackingEvent,
href
}
}));
} catch {}
try {
window.posthog?.capture?.(trackingEvent, {
href
});
} catch {}
const gaPayload = {
cta_href: href
};
try {
window.gtag?.("event", trackingEvent, gaPayload);
} catch {}
try {
window.dataLayer = window.dataLayer || [];
window.dataLayer.push({
event: trackingEvent,
...gaPayload
});
} catch {}
};
const isExternal = typeof href === "string" && (/^https?:\/\//i).test(href);
const target = buttonTarget ?? (isExternal ? "_blank" : undefined);
const linkRel = isExternal ? rel : undefined;
return ;
};
Now that you have your routes set up in your codebase, you can now add your app to Blnk Cloud. Your app needs to be registered before it can be installed by users.
To register your app:
1. In the Blnk Cloud dashboard, open `Apps` from the side navigation (bottom left).
2. Click `New app` on the right side of the Apps page.
This opens the manifest form, where you'll enter the app details in the next step.
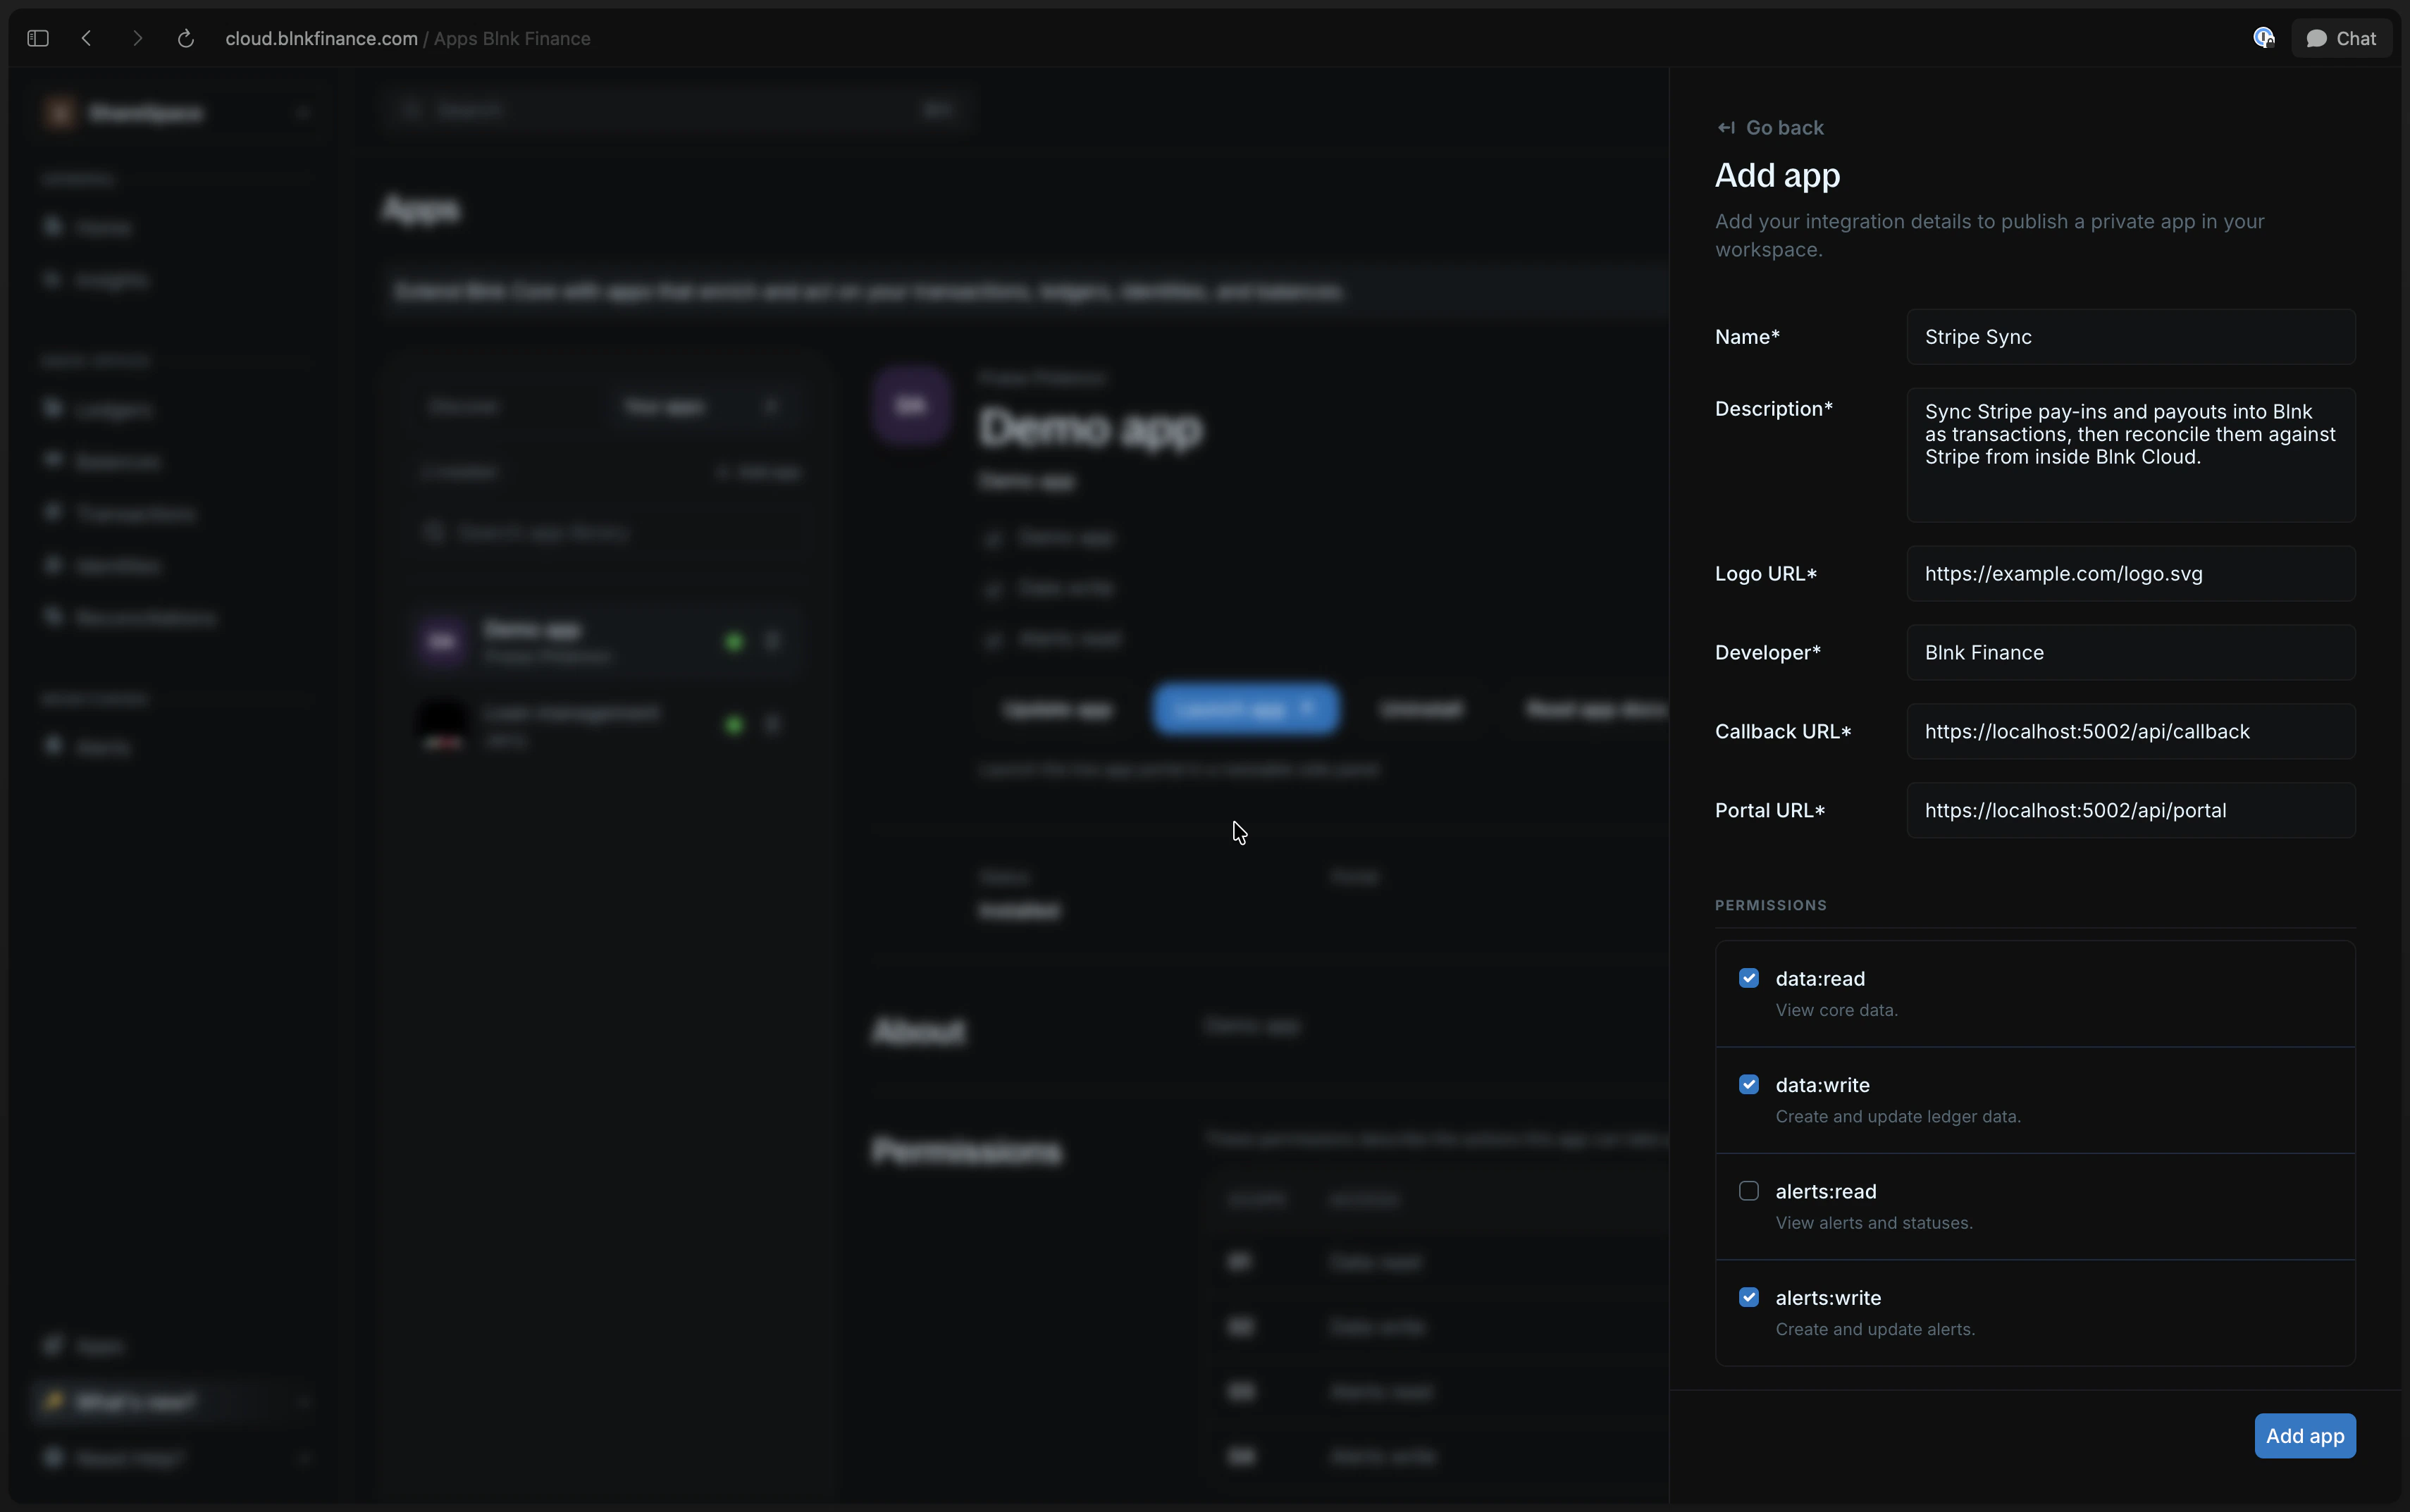
The manifest tells Blnk Cloud how to display, install, and launch your app. Fill in the manifest form with the details below.
| Field | Description |
| ------------------------- | ------------------------------------------------------------------------------------------------------------------------------------------------ |
| Display name | The name users will see in the Apps library. |
| Description | A short explanation of what your app does. |
| Logo URL | A public URL for your app logo. |
| Developer name | The company, team, or person that built the app. |
| Registration callback URL | The `https` endpoint Blnk calls when the app is installed or uninstalled. [Learn more](/cloud/apps/codebase-setup#set-up-app-routes) |
| Portal generator URL | The endpoint Blnk calls to create a short-lived URL for opening the app inside Cloud. [Learn more](/cloud/apps/codebase-setup#set-up-app-routes) |
| Permissions | The scopes your app needs to work. [Learn more](#supported-permissions) |
| Launch access | Which team members can open the app from Cloud. Default: everyone in the workspace. |
When you register the app, you can limit launch access to specific team members. Leave this unset to allow everyone in the workspace to launch the app.
**For our Stripe Sync app,** using our routes from the [codebase setup](/cloud/apps/codebase-setup) step, our manifest looks like this:
 Make sure that your base URL is accessible from the internet. If localhost, you can use a service like ngrok to create a public URL in place of `localhost:5002`.
Submit the manifest, and you're done! The app will be added to your organization's Apps library.
Only team members in your workspace can [see and install it](/cloud/apps/install-app) on whichever Cloud instances they use there.
***
## Supported permissions
Permissions define what your app can access or change in the selected Cloud instance.
Your app can request any combination of these scopes:
| Scope | What it allows |
| -------------- | ----------------------------------------------------- |
| `data:read` | Read transactions, ledgers, identities, and balances. |
| `data:write` | Create and update ledger data. |
| `alerts:read` | Read alert configurations and events. |
| `alerts:write` | Create and update alert configurations. |
`Remember:` Users choose which permissions to grant during installation. Always read `granted_permissions` from the install payload and only use what was granted.
For the example Stripe Sync app, the permission model may look like this:
| Action | Required permission |
| -------------------------------------------------------------- | ------------------- |
| Read ledgers, transactions, and balances for reconciliation | `data:read` |
| Create or update imported Stripe activity as Blnk transactions | `data:write` |
| Create alerts when sync or reconciliation finds a problem | `alerts:write` |
If a permission is missing, the app should show a clear error or hide the action from the portal.
***
Reference Stripe sync implementation.
***
We help you build custom apps for your use case or get help building your own from scratch.
Make sure that your base URL is accessible from the internet. If localhost, you can use a service like ngrok to create a public URL in place of `localhost:5002`.
Submit the manifest, and you're done! The app will be added to your organization's Apps library.
Only team members in your workspace can [see and install it](/cloud/apps/install-app) on whichever Cloud instances they use there.
***
## Supported permissions
Permissions define what your app can access or change in the selected Cloud instance.
Your app can request any combination of these scopes:
| Scope | What it allows |
| -------------- | ----------------------------------------------------- |
| `data:read` | Read transactions, ledgers, identities, and balances. |
| `data:write` | Create and update ledger data. |
| `alerts:read` | Read alert configurations and events. |
| `alerts:write` | Create and update alert configurations. |
`Remember:` Users choose which permissions to grant during installation. Always read `granted_permissions` from the install payload and only use what was granted.
For the example Stripe Sync app, the permission model may look like this:
| Action | Required permission |
| -------------------------------------------------------------- | ------------------- |
| Read ledgers, transactions, and balances for reconciliation | `data:read` |
| Create or update imported Stripe activity as Blnk transactions | `data:write` |
| Create alerts when sync or reconciliation finds a problem | `alerts:write` |
If a permission is missing, the app should show a clear error or hide the action from the portal.
***
Reference Stripe sync implementation.
***
We help you build custom apps for your use case or get help building your own from scratch.